Espresso Guides

What Is Espresso? The Beginner's Complete Guide (2026)

From grind size and 9-bar pressure to crema, extraction ratios, and tamping — a plain-English walkthrough of what espresso actually is, and everything you need to pull great shots at home.

Last Updated: October 1, 2026
18 min read

Affiliate Disclosure: This page contains affiliate links. We may earn a commission when you make a purchase through our links, at no additional cost to you. This helps us keep our content free and up-to-date. Learn more in our affiliate disclosure policy.

A properly pulled espresso shot is nothing like the bitter, over-extracted sludge served at airport kiosks. It has golden crema sitting intact, a caramel-sweet aroma rising from a tiny ceramic cup, and more complexity than you'd expect from 1.5 ounces of liquid. That's why it's worth understanding what is happening in that little cup, and why it tastes nothing like regular coffee.

So what is espresso exactly? Most people assume it's a type of bean, a roast level, or just “very strong coffee”—and that assumption is the core of the espresso vs coffee difference most beginners miss. Espresso is a brewing method: hot water forced through finely ground coffee under 9 bars of pressure, producing a concentrated, complex liquid unlike anything from other techniques. This guide walks through how espresso is made step by step, and how to make it at home—from grind size and tamping to dialing in your first shot.

Quick Answer

Espresso is coffee brewed by forcing hot water through finely ground coffee at roughly 9 bars of pressure, producing a small, concentrated shot topped with crema.

Our pick for this: Gaggia Classic Pro ($450–$550) — a commercial-style 9-bar pump and PID-friendly boiler that make it easy to dial in consistent shots

What Is Espresso, Exactly?

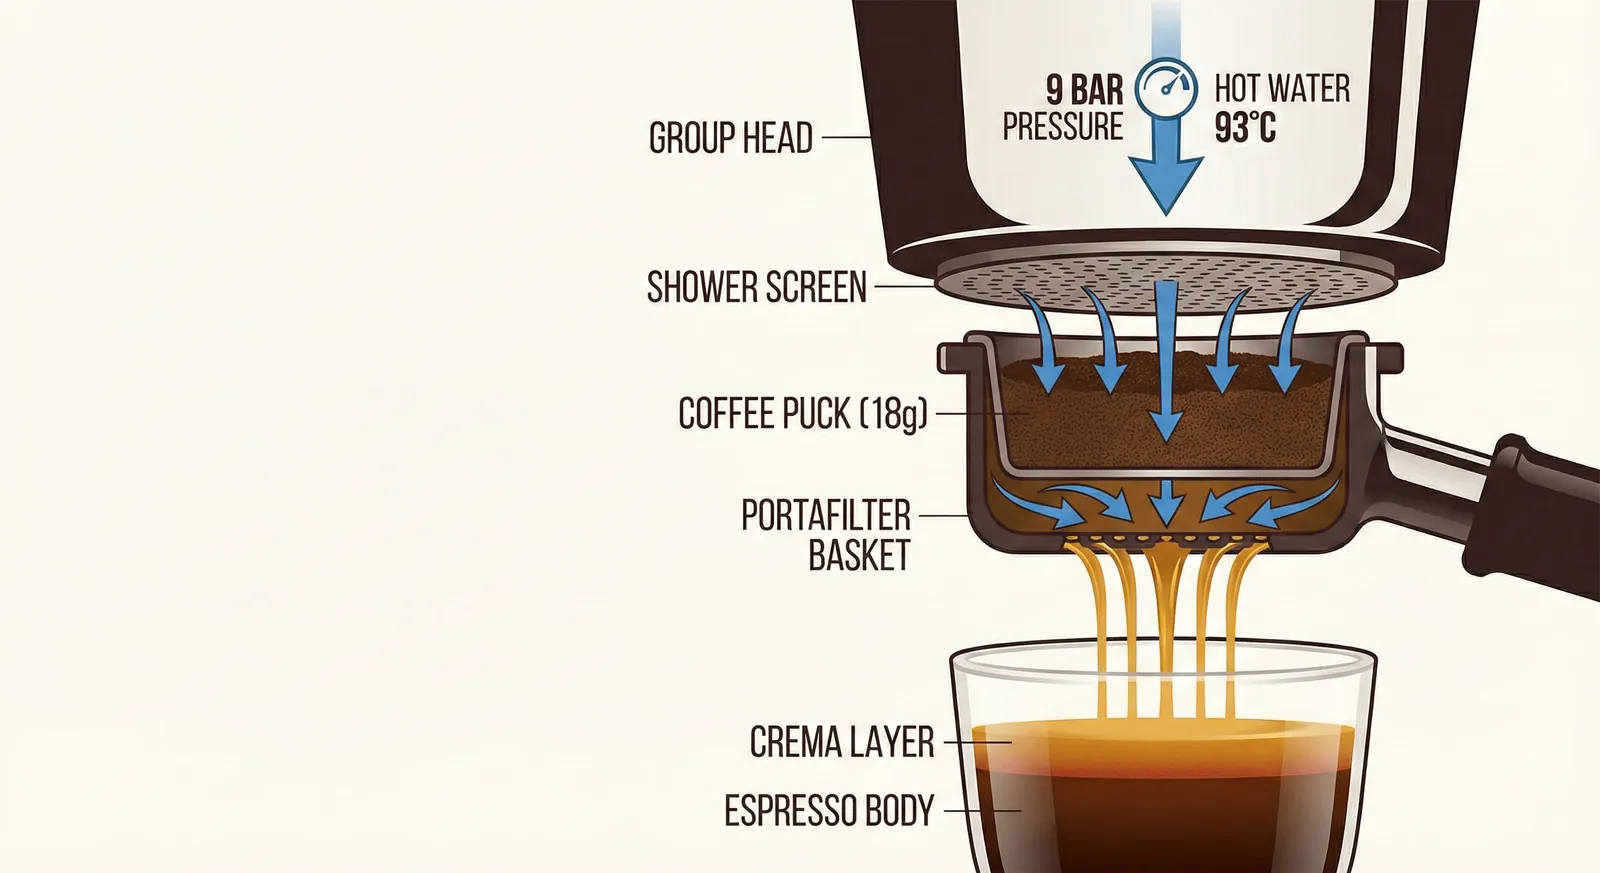
Espresso, at its core: hot water—typically 90–96°C (194–205°F)—forced through a compact puck of finely ground coffee under roughly 9 bars of pressure. The whole extraction takes 25–30 seconds and hands you 1–2 ounces (30–60ml) of intensely concentrated coffee, topped with a layer of reddish-brown foam called crema.

It's not a roast level—you can pull espresso from light, medium, or dark roasts. It's not a type of bean—any Arabica or Robusta variety works. And it's not just “strong coffee.” The pressurized extraction emulsifies coffee oils and CO2 into the liquid in a way gravity-based methods simply can't do, creating a syrupy body and flavor intensity unique to this method.

What makes espresso chemically distinct comes down to composition. A properly extracted shot runs roughly 8–12% dissolved solids (Total Dissolved Solids, or TDS), compared to 1–2% in drip coffee. It also carries emulsified coffee oils suspended in the liquid—oils that paper filters strip out of drip coffee but pass freely through espresso's metal basket. Those oils are why espresso has that rich mouthfeel, aromatic complexity, and caloric density drip coffee doesn't.

Labeled diagram of espresso extraction anatomy showing portafilter basket, coffee puck, group head, 9-bar pressure arrow, flow direction, and resulting crema layer—educational infographic for espresso beginners
VariableIdeal Range
Pressure9 bars
Temperature90–96°C
Dose18g (double)
Yield36g
Time25–30 seconds

Espresso vs Regular Coffee: Key Differences

One of the most common questions from new baristas is: "Is espresso just strong coffee?" The answer is no—and understanding why explains a lot about what makes espresso special.

FactorEspressoDrip Coffee
Pressure9 bars (≈130 psi)Gravity only (1 bar)
Extraction Time25–30 seconds4–6 minutes
Grind SizeFine (like table salt)Medium (like sand)
Serving Size1–2 oz (30–60ml)8–16 oz (240–480ml)
TDS (Concentration)8–12%1–2%
Caffeine per Serving~128mg (double shot)~180–240mg (12 oz)
CremaYes (emulsified oils + CO2)No
Oil ContentHigh (unfiltered)Low (paper-filtered)

Notice the caffeine comparison—a surprise for most people. Despite espresso's intensity, a double shot delivers less total caffeine than a large mug of drip coffee. Espresso feels stronger because you consume it quickly in a highly concentrated form, delivering caffeine rapidly. Drip coffee spreads a larger dose over a longer drinking period.

How Espresso Is Made: Step by Step

The process looks simple from the outside—press a button, get coffee. Under the surface, a lot is happening that determines whether your shot is extraordinary or merely adequate.

  1. Grind the Coffee. Freshly grind 7–10g (single) or 14–21g (double) of coffee to a fine consistency. Grind immediately before brewing—ground coffee stales within minutes as volatile aromatic compounds dissipate. This single step affects the shot more than almost any other variable.
  2. Dose and Distribute. Weigh your dose using a precision scale (0.1g accuracy). Distribute grounds evenly in the portafilter basket using a distribution tool or the Stockfleth method (rotating finger across the surface). Uneven distribution creates channels where water takes the path of least resistance, bypassing properly packed sections.
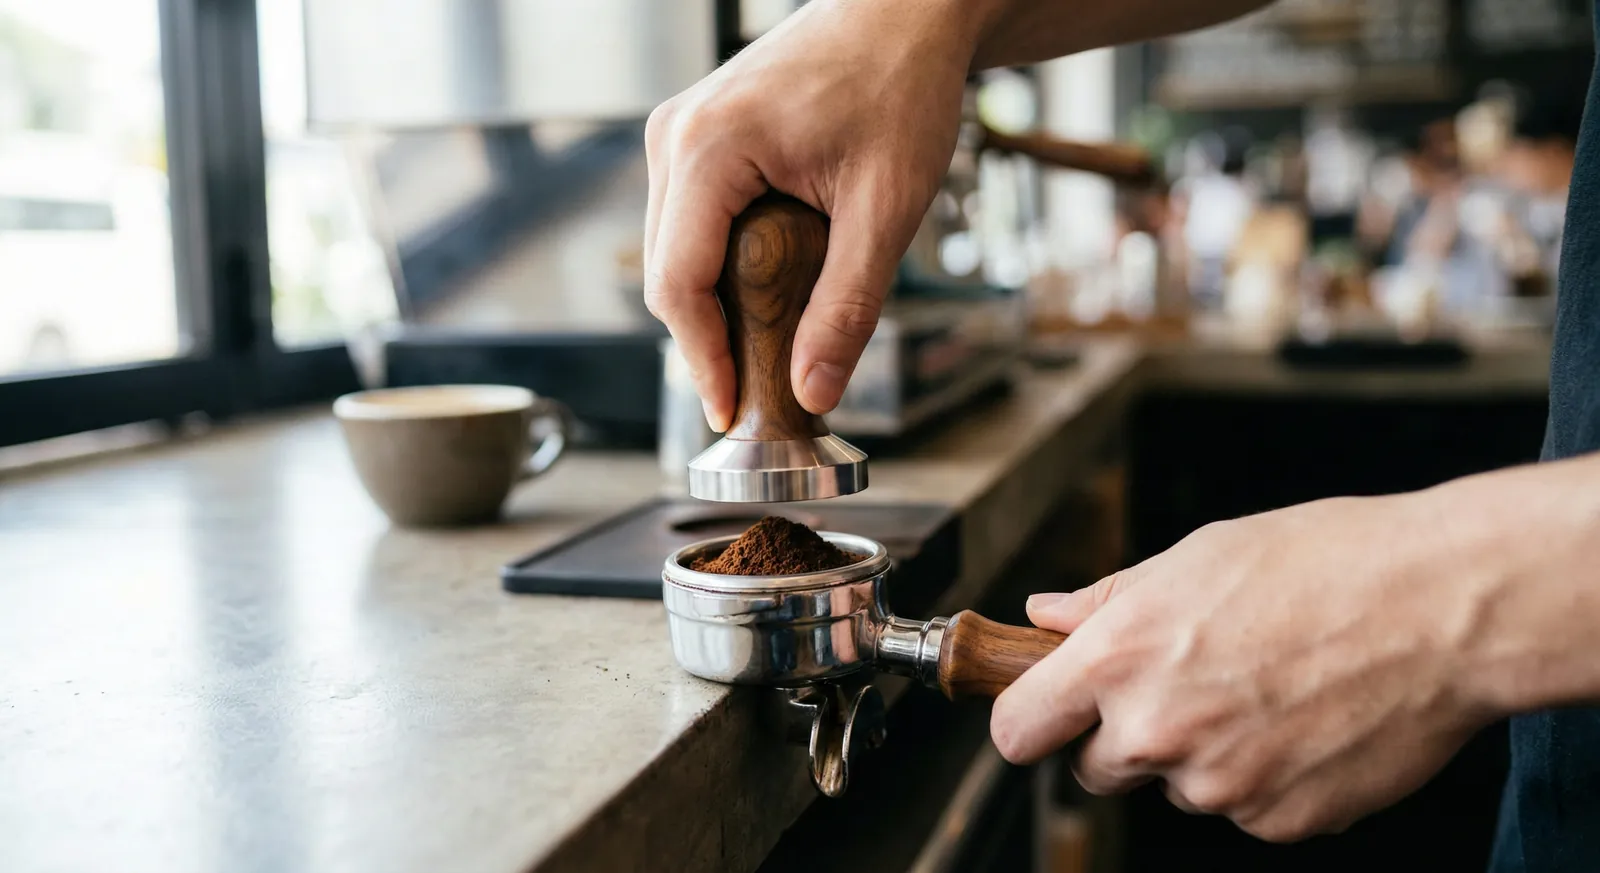
  3. Tamp. Press the tamper down onto the grounds with approximately 30 lbs (13.5kg) of force—about the effort of a firm handshake. The goal is a level, compressed puck. Angle matters more than exact pressure: an unlevel tamp creates an uneven puck density, causing channeling. After the main tamp, a gentle "polish" twist seals the surface.
  4. Lock In and Pre-Infuse. Lock the portafilter into the group head. Many modern machines pre-infuse—applying low pressure (2–4 bars) for 3–8 seconds before ramping to full extraction pressure. Pre-infusion saturates the puck evenly, reducing channeling and producing more uniform extraction.
  5. Extract at 9 Bars. The pump drives hot water at 9 bars through the puck. First drops emerge (the "blonde"—highest concentration, sweetest), followed by the main body, then the tail (increasingly bitter, watery). Time this carefully: a double shot of 36–40g should emerge in 25–30 seconds. Stop the shot at the right moment—don't just let it run.
  6. Taste and Adjust. Every shot is a data point. Taste it, note extraction time and yield, and adjust one variable at a time. This is the step most beginners skip—tasting and systematically adjusting is what transforms inconsistent espresso into reliably excellent shots.
Barista hands demonstrating correct espresso tamping technique—level 30-pound tamp on 58mm portafilter with precision tamper, showing proper wrist alignment and even coffee puck compression for optimal extraction

Grind Size: The Biggest Variable in Espresso

Grind size is the single most important variable in espresso — nothing else comes close. Getting it right unlocks consistency; getting it wrong makes everything else irrelevant.

Espresso requires a fine grind — significantly finer than drip or pour-over, close to the texture of table salt. At 9 bars, water needs enough resistance to slow down and extract properly: too coarse and it rushes through, tasting sour; too fine and it barely passes, over-extracting and tasting bitter.

Why Freshness Affects Grind Setting

Freshly roasted beans are saturated with CO2, which dissipates over days and weeks. Fresh beans (1–2 weeks) often need a coarser grind, since CO2 acts as additional resistance; beans at 3–4 weeks typically need a finer grind. This is why a new bag of beans needs re-dialing even if nothing else changes.

Burr Grinder vs Blade Grinder for Espresso

A blade grinder produces an inconsistent particle size distribution, from powder to chunks — for espresso, that's catastrophic, since fine particles over-extract while coarse ones under-extract in the same puck. A quality burr grinder crushes beans between two abrasive surfaces for a far more consistent particle size. Budget at least $200. Our best coffee grinders guide covers top options at every price point.

Side-by-side comparison of espresso grind sizes: too coarse (pale, fast-flowing shot), correct fine grind (rich golden crema, ideal extraction), and too fine (near-clogged portafilter with over-extracted dark shot)—visual guide for dialing in espresso

9-Bar Pressure: Why It Matters (And Why More Isn't Better)

Most machine marketing highlights "15 bars" in large font, implying higher pressure means better espresso — it doesn't. The industry standard is 9 bars at the puck, the pressure water actually reaches when it contacts the grounds. The 15-bar pumps in consumer machines generate maximum pump pressure, but actual brewing pressure at the group head is regulated down to 9.

Why 9 bars specifically? It's the balance between efficiency (extracting desirable compounds) and selectivity (not forcing out excessive bitterness) — decades of espresso tradition and industry testing converged on 8.5–9.5 bars as the sweet spot. Below 7 bars you get thin, under-extracted shots with poor crema; above 11 bars you risk channeling and over-extraction.

Pressure Profiling: Advanced Extraction Control

High-end machines now offer pressure profiling — varying pressure throughout the extraction to mimic vintage lever machines and allow extraordinary control over flavor development. For beginners, constant 9-bar pressure is the target; profiling is for experienced users coaxing out particular flavor profiles.

Understanding Espresso Crema

Crema is the reddish-brown foam that crowns a properly pulled shot. When water under 9 bars contacts the grounds, it dissolves CO2 gas and emulsifies coffee oils; as pressure drops on exit, that CO2 rapidly expands into millions of tiny oil-coated bubbles.

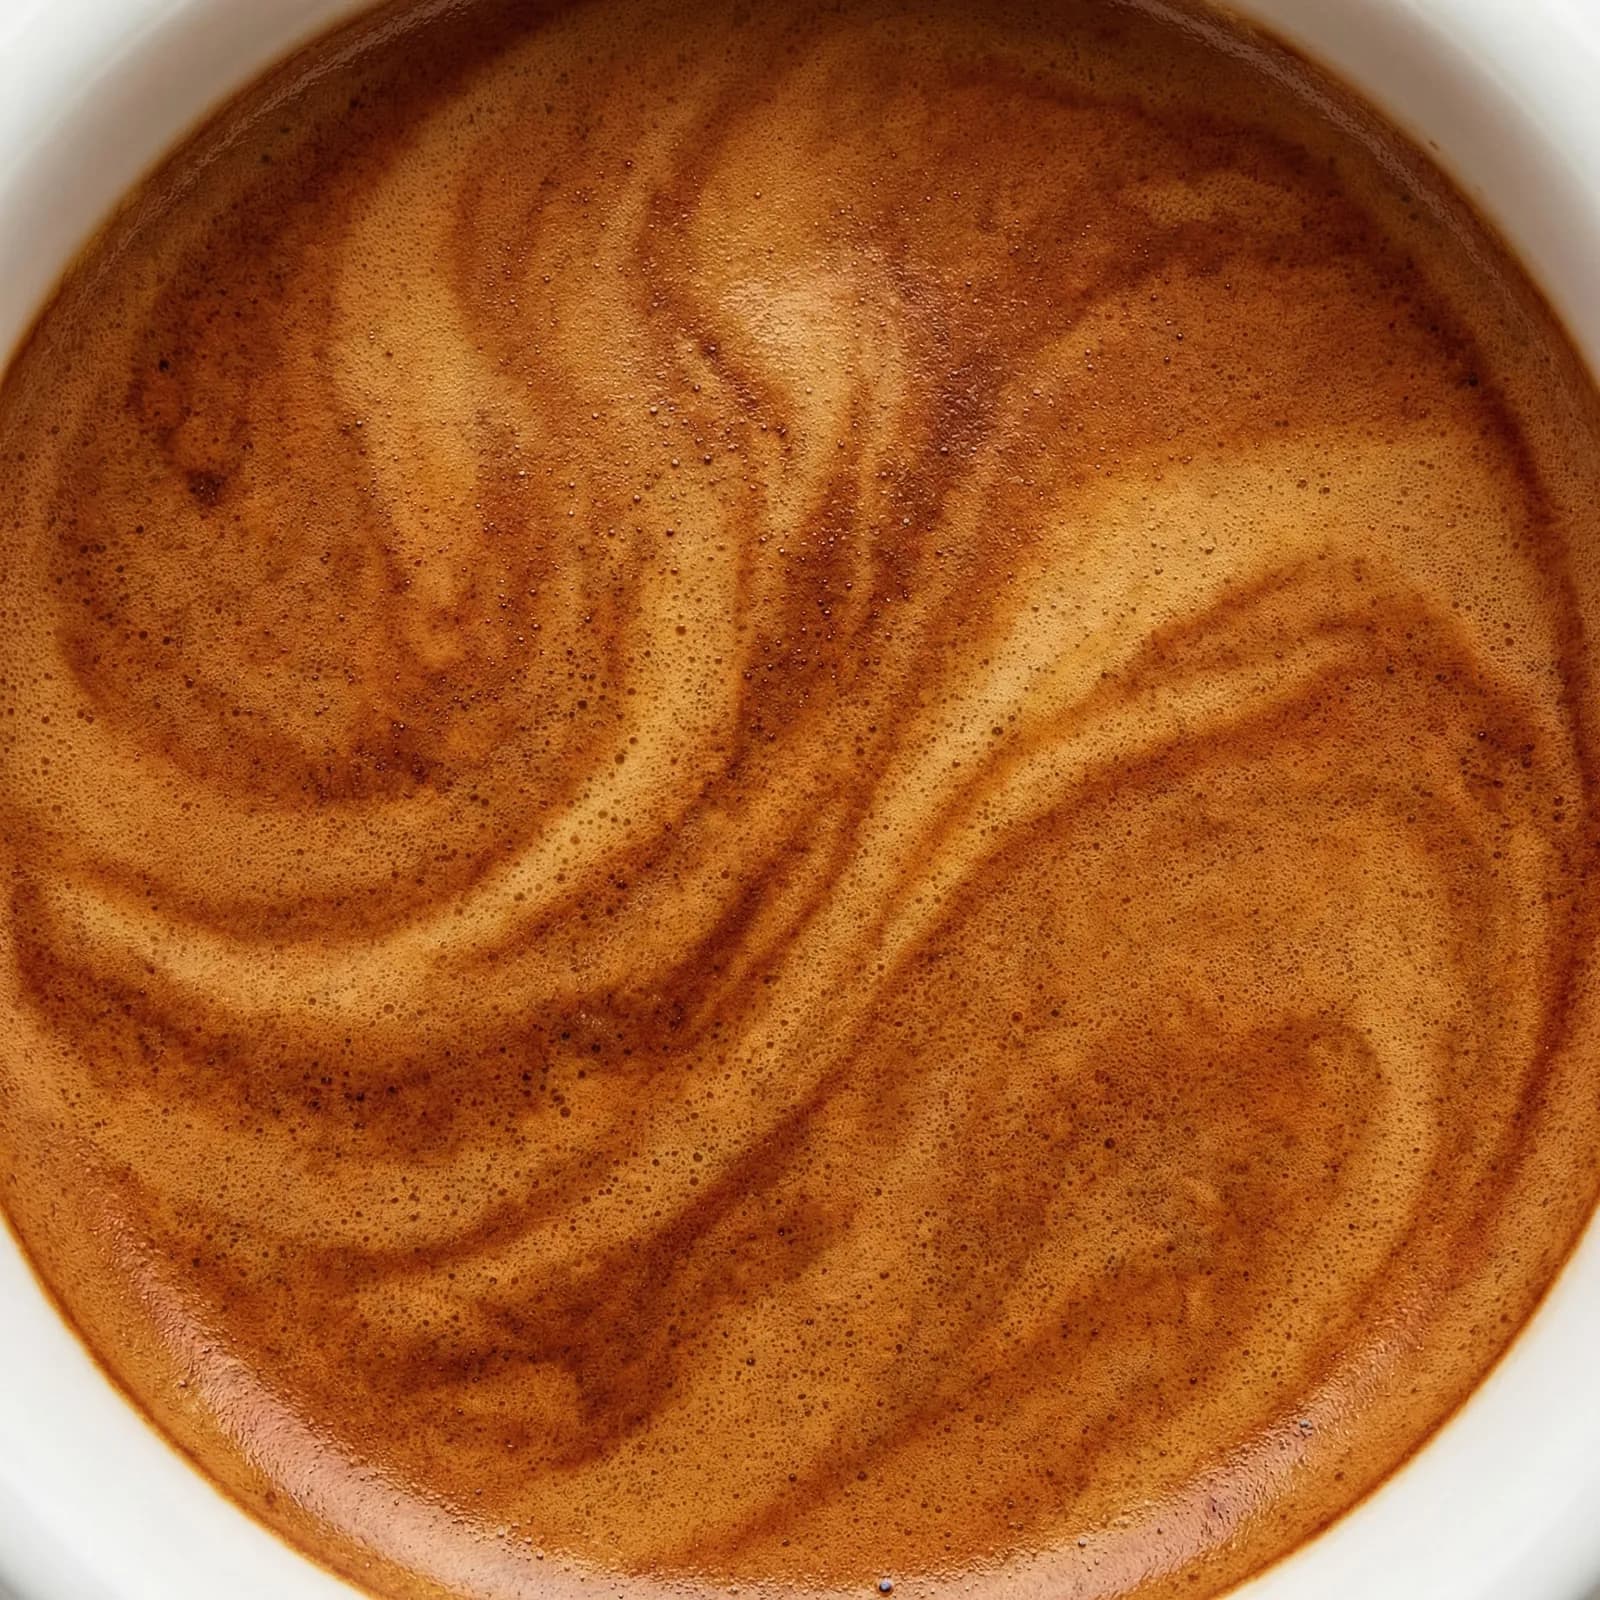
Good crema is reddish-brown ("hazelnut") with tiger-stripe patterns caused by varying CO2 concentrations across the puck, and should persist for 2–3 minutes. It contributes both visual appeal and mouthfeel to the shot.

Macro photography of espresso crema showing tiger-stripe pattern, reddish-brown color, fine bubble structure, and persistent foam layer on freshly extracted espresso shot in white ceramic demitasse—ideal crema characteristics

What Crema Tells You (And What It Doesn't)

  • Thick, persistent crema suggests fresh beans and proper extraction. Beans produce more CO2 when recently roasted; that CO2 abundance creates abundant crema.
  • Thin, quickly dissipating crema typically indicates stale beans (most CO2 has degassed) or under-extraction.
  • Dark, very bitter crema often comes from over-extraction or very dark roasts—the compounds responsible are bitter, not pleasant.
  • Pale, blonde crema can indicate under-extraction or beans that are simply too fresh (just-roasted beans, within 48 hours, produce unstable crema from excess CO2).
  • Thick crema doesn't guarantee great flavor—Robusta beans and very dark roasts produce impressive crema but often lack the flavor complexity of well-extracted Arabica.

For a complete breakdown of crema — including what golden crema and tiger stripes actually indicate, why thick crema isn't always a quality signal, and how to troubleshoot crema problems — see our dedicated espresso crema guide.

Dose, Yield, and Brew Ratio: The Numbers That Matter

Before specialty coffee embraced measurement culture, espresso was made by feel—a practiced scoop, a tamp that felt right, a shot that looked done. Today, weighing both the dry input (dose) and liquid output (yield) has become standard practice in serious cafés. Here's why those numbers matter.

Dose (Input)

The dry weight of coffee grounds in the portafilter basket. Standard double shot: 14–21g depending on basket size. Most modern double baskets are designed for 18–20g. Weigh with a precision scale—1g difference noticeably affects the shot.

Yield (Output)

The liquid weight of espresso in the cup. For a 1:2 brew ratio with 18g dose, target 36g yield. Weigh your cup on the scale before extraction and watch the number climb—stop when you hit your target weight.

Brew Ratio

Dose ÷ Yield. The classic espresso ratio is 1:2 (e.g., 18g in / 36g out). Ristretto runs 1:1.5 for sweeter, more concentrated shots. Lungo stretches to 1:3+ for milder, larger extractions.

Weighing yield instead of eyeballing it is what transformed espresso from a feel-based craft into something repeatable—a great shot today becomes a great shot tomorrow, instead of a happy accident. If you're serious about home espresso, a $15–$30 drip tray scale is one of the highest return-on-investment purchases you can make.

Extraction: Under, Over, and Just Right

Extraction refers to how much of the soluble material in coffee grounds transfers into your cup. A widely used target is 18–22% extraction yield, often called the "ideal" range for balanced espresso. Under-extraction (below 18%) leaves pleasant compounds behind, producing a sour, one-dimensional shot. Over-extraction (above 22%) pulls out undesirable harsh, bitter, and astringent compounds. For a deeper look at every variable that controls this — grind size, brew ratio, channeling, pre-infusion, and how to diagnose a bad shot — see our complete espresso extraction guide.

Under-Extracted

  • • Sour, acidic, sharp taste
  • • Thin, watery body
  • • Pale, blonde crema
  • • Shot runs too fast (<20 sec)
  • • Fix: Grind finer, raise temperature, increase dose

Properly Extracted

  • • Sweet, balanced, complex
  • • Syrupy, coating body
  • • Rich reddish-brown crema
  • • 25–30 second shot time
  • • Result: Balanced acidity, sweetness, bitterness

Over-Extracted

  • • Bitter, harsh, astringent
  • • Dry, uncomfortable finish
  • • Dark, bitter crema
  • • Shot runs too slow (>35 sec)
  • • Fix: Grind coarser, lower temperature, reduce dose

Espresso as a Base: The Drinks It Creates

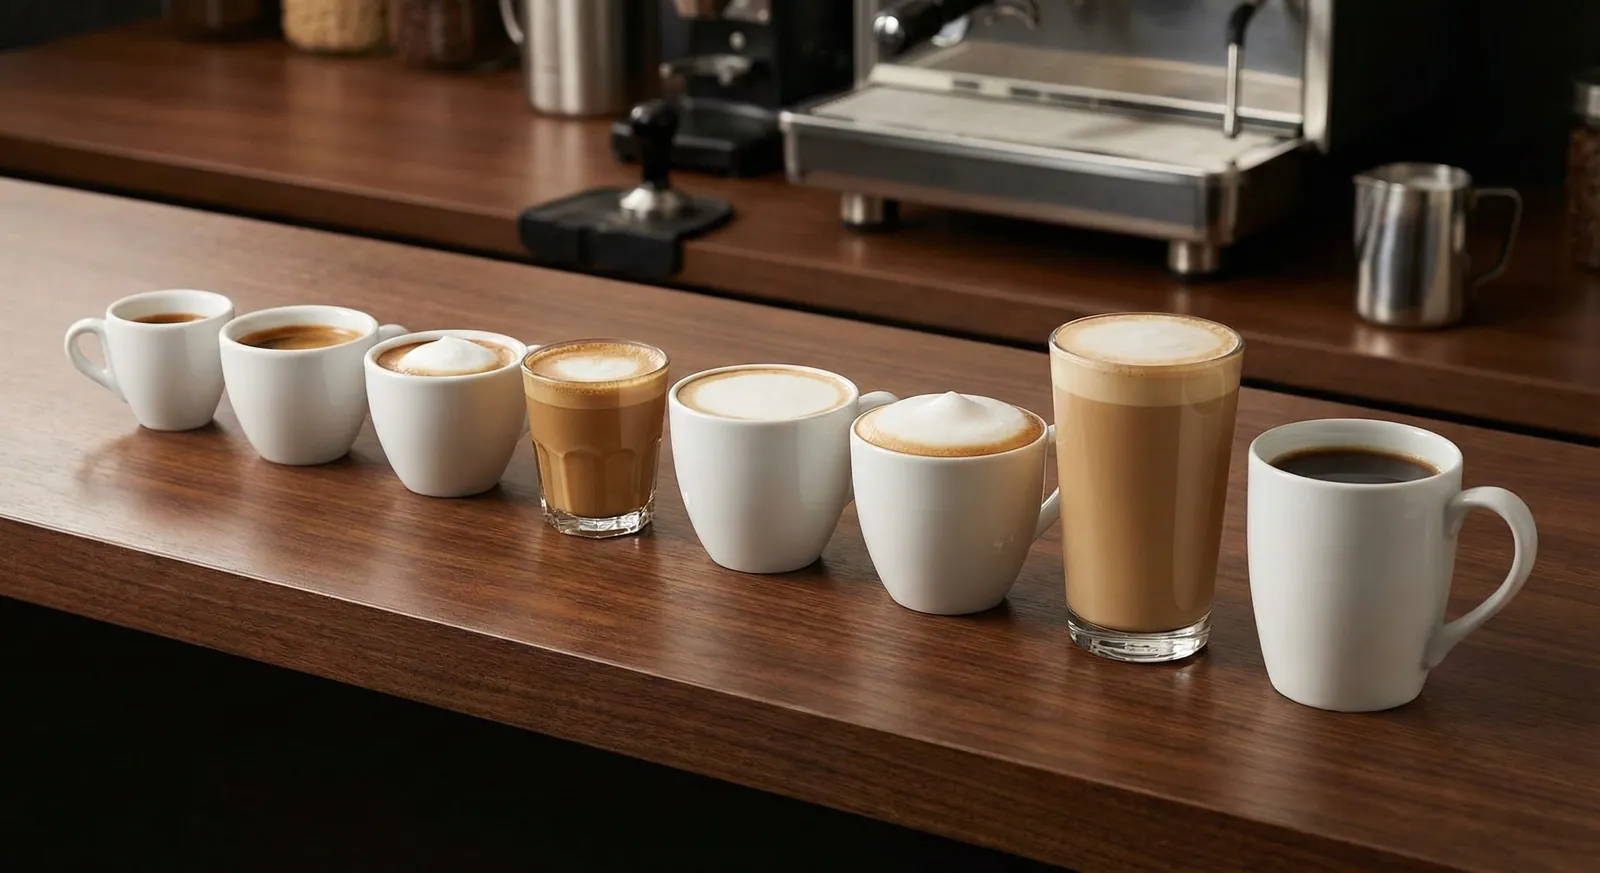
Espresso is the foundation of the vast majority of café drinks worldwide. Understanding that foundation changes how you read a café menu—every item makes more sense when you understand what the espresso base is doing.

  • [Americano](/guide/americano-vs-espresso): 1–2 shots + 6–8 oz hot water. Espresso flavor in a larger, slower-drinking format. The hot water is added after the espresso.
  • Latte: 2 shots + 8–10 oz steamed milk with thin microfoam layer. Milk-forward, smooth, approachable. The most popular espresso drink globally.
  • [Cappuccino](/guide/flat-white-vs-cappuccino-vs-cortado): 2 shots + equal parts steamed milk and thick foam (6 oz total). Three distinct layers: espresso, steamed milk, foam cap. Traditionally morning-only in Italy.
  • [Flat White](/guide/flat-white-vs-cappuccino-vs-cortado): 2 ristretto shots + 4–5 oz steamed milk, velvety microfoam throughout. Stronger than a latte, silkier than a cappuccino. Australian/New Zealand origin.
  • [Cortado](/guide/latte-vs-cortado): 2 shots + 2 oz warm milk. 1:1 ratio cuts espresso acidity without hiding its character. Spanish in origin, popular among specialty coffee enthusiasts.
  • [Macchiato (Traditional)](/guide/macchiato-vs-latte): 1–2 shots + small dollop of foam or steamed milk. "Stained" espresso—just enough milk to visually mark the shot and soften the sharpest edges.
  • [Ristretto](/guide/what-is-a-ristretto): A restricted espresso: same dose but a shorter yield (about 1:1 to 1:1.5 ratio). Sweeter, more concentrated, less bitter. Used as the base for flat whites.
  • [Doppio](/guide/what-is-doppio): The standard double espresso shot — 18g dose, 36g yield, 1:2 brew ratio. The default espresso in virtually every specialty café worldwide and the base for all drinks on this list.
  • [Lungo](/guide/what-is-a-lungo): Extended espresso: same dose but double or triple the yield. Longer extraction time, milder and more bitter than standard espresso.
Professional lineup of eight espresso-based drinks in order from pure espresso to latte—ristretto, espresso, macchiato, cortado, flat white, cappuccino, latte, and americano—showing progressive milk-to-espresso ratios in matching white ceramic cups

Equipment You Actually Need

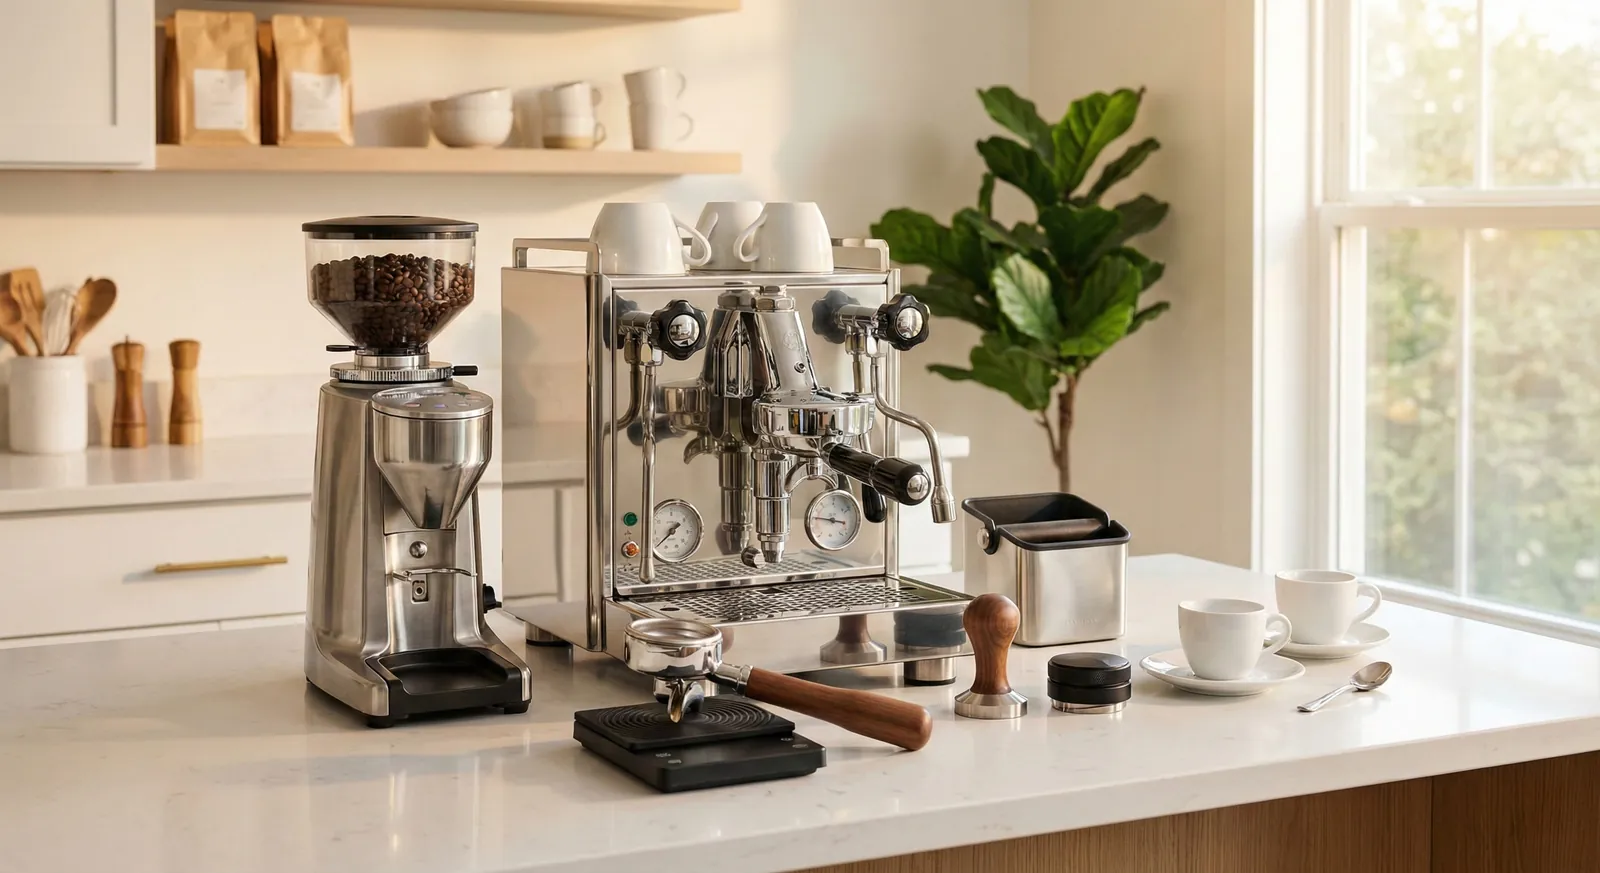
Here's what actually matters for espresso equipment, versus what's marketed aggressively but makes little difference, in priority order:

01 — Burr Grinder (Highest Priority)

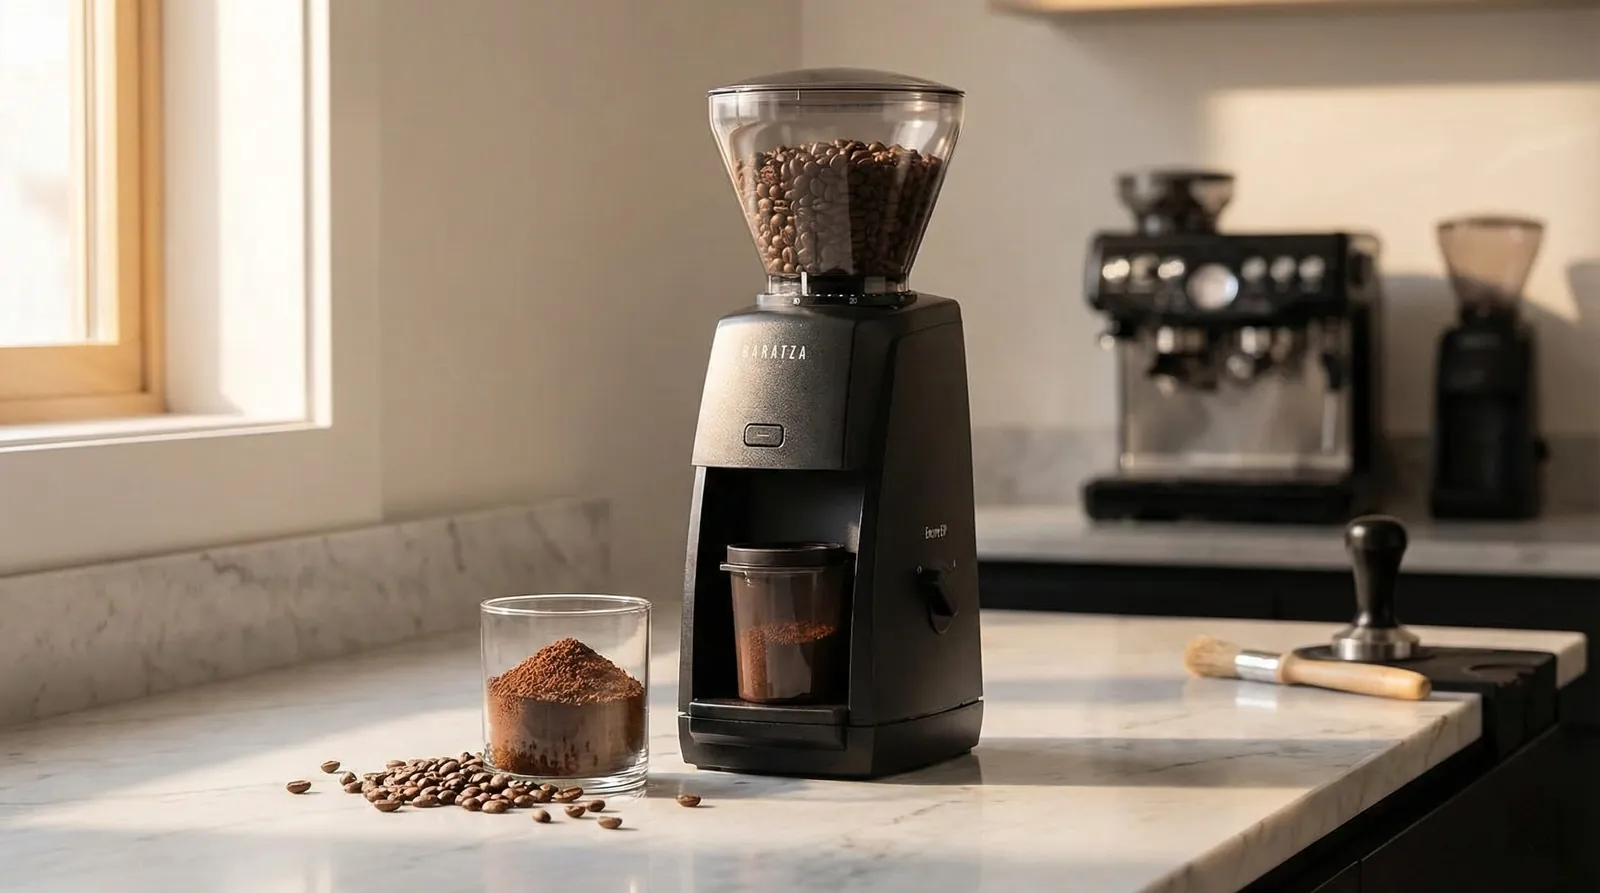
A quality burr grinder matters more than an expensive espresso machine. The grind consistency from a burr grinder is the foundation of everything. Entry-level dedicated espresso grinders (such as the Baratza Encore ESP at $199–$299 or the Baratza Sette 270) outperform $1,000+ machines paired with blade grinders. If you have $600 to spend total, put $250 on the grinder and $350 on the machine.

02 — Espresso Machine with Pressure Regulation

Look for: 9-bar pressure regulation (OPV), temperature stability, and a real steam wand if you want milk drinks. For beginners: Breville Bambino Plus ($399–$449), De'Longhi Dedica ($200–$250). Intermediate step-up: Breville Barista Express (built-in grinder, $449–$699), Gaggia Classic Pro ($450–$550). These machines deliver consistent pressure and temperature that budget machines can't match. Not sure which type suits you? Our espresso machine types guide breaks down every category, and our best espresso machines page shows top-tested picks at every budget.

03 — Precision Scale (0.1g Accuracy)

A $15–$30 scale that fits under your portafilter and reads to 0.1g transforms your espresso consistency. Weigh dose in, weigh yield out. Repeatability is the goal—once you find a recipe that works (e.g., 18g in / 36g out / 28 seconds), a scale lets you reproduce it exactly every morning.

04 — Fresh, Quality Beans

Buy beans roasted within the past 2–4 weeks. (Our guide to picking espresso beans covers this in depth.) Check the roast date (not \"best by\" date—that's meaningless). Specialty roasters print roast dates; supermarket bags usually don't. Look for Arabica-dominant blends with flavor notes you enjoy (chocolate/caramel for approachable espresso, fruity/floral for adventurous profiles). Store in an airtight container away from heat and light.

05 — Tamper (Level and Calibrated)

Match tamper diameter to your basket (most are 58mm for commercial, 54mm for Breville machines). A calibrated tamper that clicks at 30 lbs of pressure ($30–$60) is helpful for beginners. More important than pressure consistency is angle—a level tamp creates an even puck. A simple distribution tool ($10–$25) helps distribute grounds evenly before tamping. For the full step-by-step process, our espresso tamping guide covers distribution, levelness, and pressure in detail.

Well-organized home espresso setup on white marble counter: semi-automatic espresso machine, matching burr grinder, precision scale, calibrated tamper, distribution tool, knock box, and two white demitasse cups—complete beginner espresso station

Beginner Brewing Tips: What Every New Barista Should Know

The same mistakes and breakthroughs repeat with almost every new barista. Here are the most impactful tips:

  • Purge your machine before pulling a shot: Run hot water through the group head for 3–5 seconds before inserting the portafilter. This purges stale water from the boiler and stabilizes temperature. It also warms the group head, which affects extraction temperature significantly.
  • Warm your cups: Pour hot water into your demitasse cup for 30 seconds before extraction. A cold cup drops espresso temperature immediately—warm cups preserve the drink's aroma and flavor from first sip to last. Simple but impactful.
  • Taste at the right temperature: Espresso should be consumed within 60–90 seconds of extraction, when it's hot but not scalding (roughly 140–150°F). As it cools past 120°F, flavor compounds change—some improve, some degrade. Tasting at different temperatures is educational, but your main assessment should happen in the optimal window.
  • Don't obsess over crema: Beautiful tiger-striped crema doesn't guarantee a great shot. Dark roasts and Robusta-heavy blends produce impressive crema from poor extractions. Light roasts from top-tier beans may produce thinner crema with spectacular flavor. Taste the shot, not the crema.
  • Keep detailed notes while dialing in: Write down: dose in, yield out, extraction time, grind setting, and tasting notes for every shot when working with new beans. A simple notebook or notes app works fine. After 5–10 shots you'll have a clear picture of the ideal recipe for those beans—and you won't have to dial in from scratch next time.
  • Clean your equipment after every session: Coffee oils turn rancid quickly. After each session: purge the steam wand, wipe the group head, empty and rinse the drip tray, and knock the puck out immediately. Weekly: backflush with water, monthly with cleaning tablets. A clean machine extracts cleaner flavors—old coffee residue adds bitterness and off-notes.
  • Accept that dialing in is part of the process: Even professional baristas pull several adjustment shots at the start of each day with a new bag of beans. Dialing in isn't a sign you're doing something wrong—it's the process of calibrating your recipe to today's beans and conditions. Every shot that doesn't taste right is data, not failure.

Reviewed Espresso Equipment

Reviewed Espresso Equipment

REVIEWED

Breville Bambino Plus

$399–$449

ThermoJet 3-second heat-up, pre-infusion, auto steam wand — a strong beginner espresso machine for learning extraction fundamentals.
REVIEWED

Gaggia Classic Pro

$450–$550

Commercial group head, 9-bar OPV, manual steam wand — the benchmark semi-automatic for learning real espresso technique at home.
REVIEWED

Baratza Encore ESP

$199–$299

Entry-level espresso burr grinder with consistent particle size — the right first grinder for dialing in grind for espresso.

Frequently Asked Questions

Not quite.

Espresso is a specific brewing method that forces hot water through finely ground coffee under 9 bars of pressure.

It's more concentrated than drip — roughly 4 to 12 times more dissolved solids per ounce — but the pressurized extraction also emulsifies coffee oils, creates crema, and develops a syrupy body you can't replicate with any other brewing method, even a tiny, super-strong pour-over.