How to Make a Latte at Home — Step-by-Step Barista Guide (2026)
A Q Grader with 12+ years of barista training breaks down the exact ratio, milk steaming technique, and pour method — everything you need to make a café-quality latte at home
A latte is the most ordered espresso drink in the world — and also one of the most misunderstood to make at home. Most people who try it for the first time end up with either an espresso that gets completely lost in a cup of warm milk, or stiff froth that sits on top like shaving cream. Neither is a latte.
I've trained baristas on latte technique for over 12 years. The gap between a mediocre home latte and a café-quality one almost always comes down to two things: the espresso-to-milk ratio, and how the milk is textured. Get those right, and everything else follows.
This guide covers everything: the correct ratio, step-by-step steaming technique, which milk to use, how to make a latte without an espresso machine, the difference between a latte and a cappuccino, and the most common mistakes and how to fix them. Whether you have a home espresso machine or just a Moka pot and a handheld frother, you'll be making better lattes after reading this.

Latte at a Glance
A café latte (Italian: caffè latte — “coffee with milk”) is a double espresso combined with steamed whole milk and finished with a thin layer of microfoam. It is the largest and mildest of the espresso-based milk drinks, designed to be sipped slowly over 10–15 minutes.
Quick Reference
- Espresso: 1 double shot — 18g coffee, 60 ml yield
- Milk: 150–240 ml steamed whole milk
- Foam: 5–10 mm of silky microfoam — not thick froth
- Milk temperature: 60–65°C (140–150°F)
- Total drink size: 210–300 ml
- Espresso-to-milk ratio: 1:4 to 1:6
- Brew time: Under 5 minutes total
| Component | Standard Latte | Cappuccino | Flat White |
|---|---|---|---|
| Espresso | 60 ml (double) | 60 ml (double) | 60 ml (double) |
| Steamed milk | 150–240 ml | 60–80 ml | 100–120 ml |
| Foam layer | 5–10 mm microfoam | 1–2 cm dry foam | Thin microfoam only |
| Total volume | 210–300 ml | 150–180 ml | 160–180 ml |
| Espresso intensity | Mild — milk-forward | Strong — balanced | Medium — espresso-forward |
What You Need to Make a Latte at Home
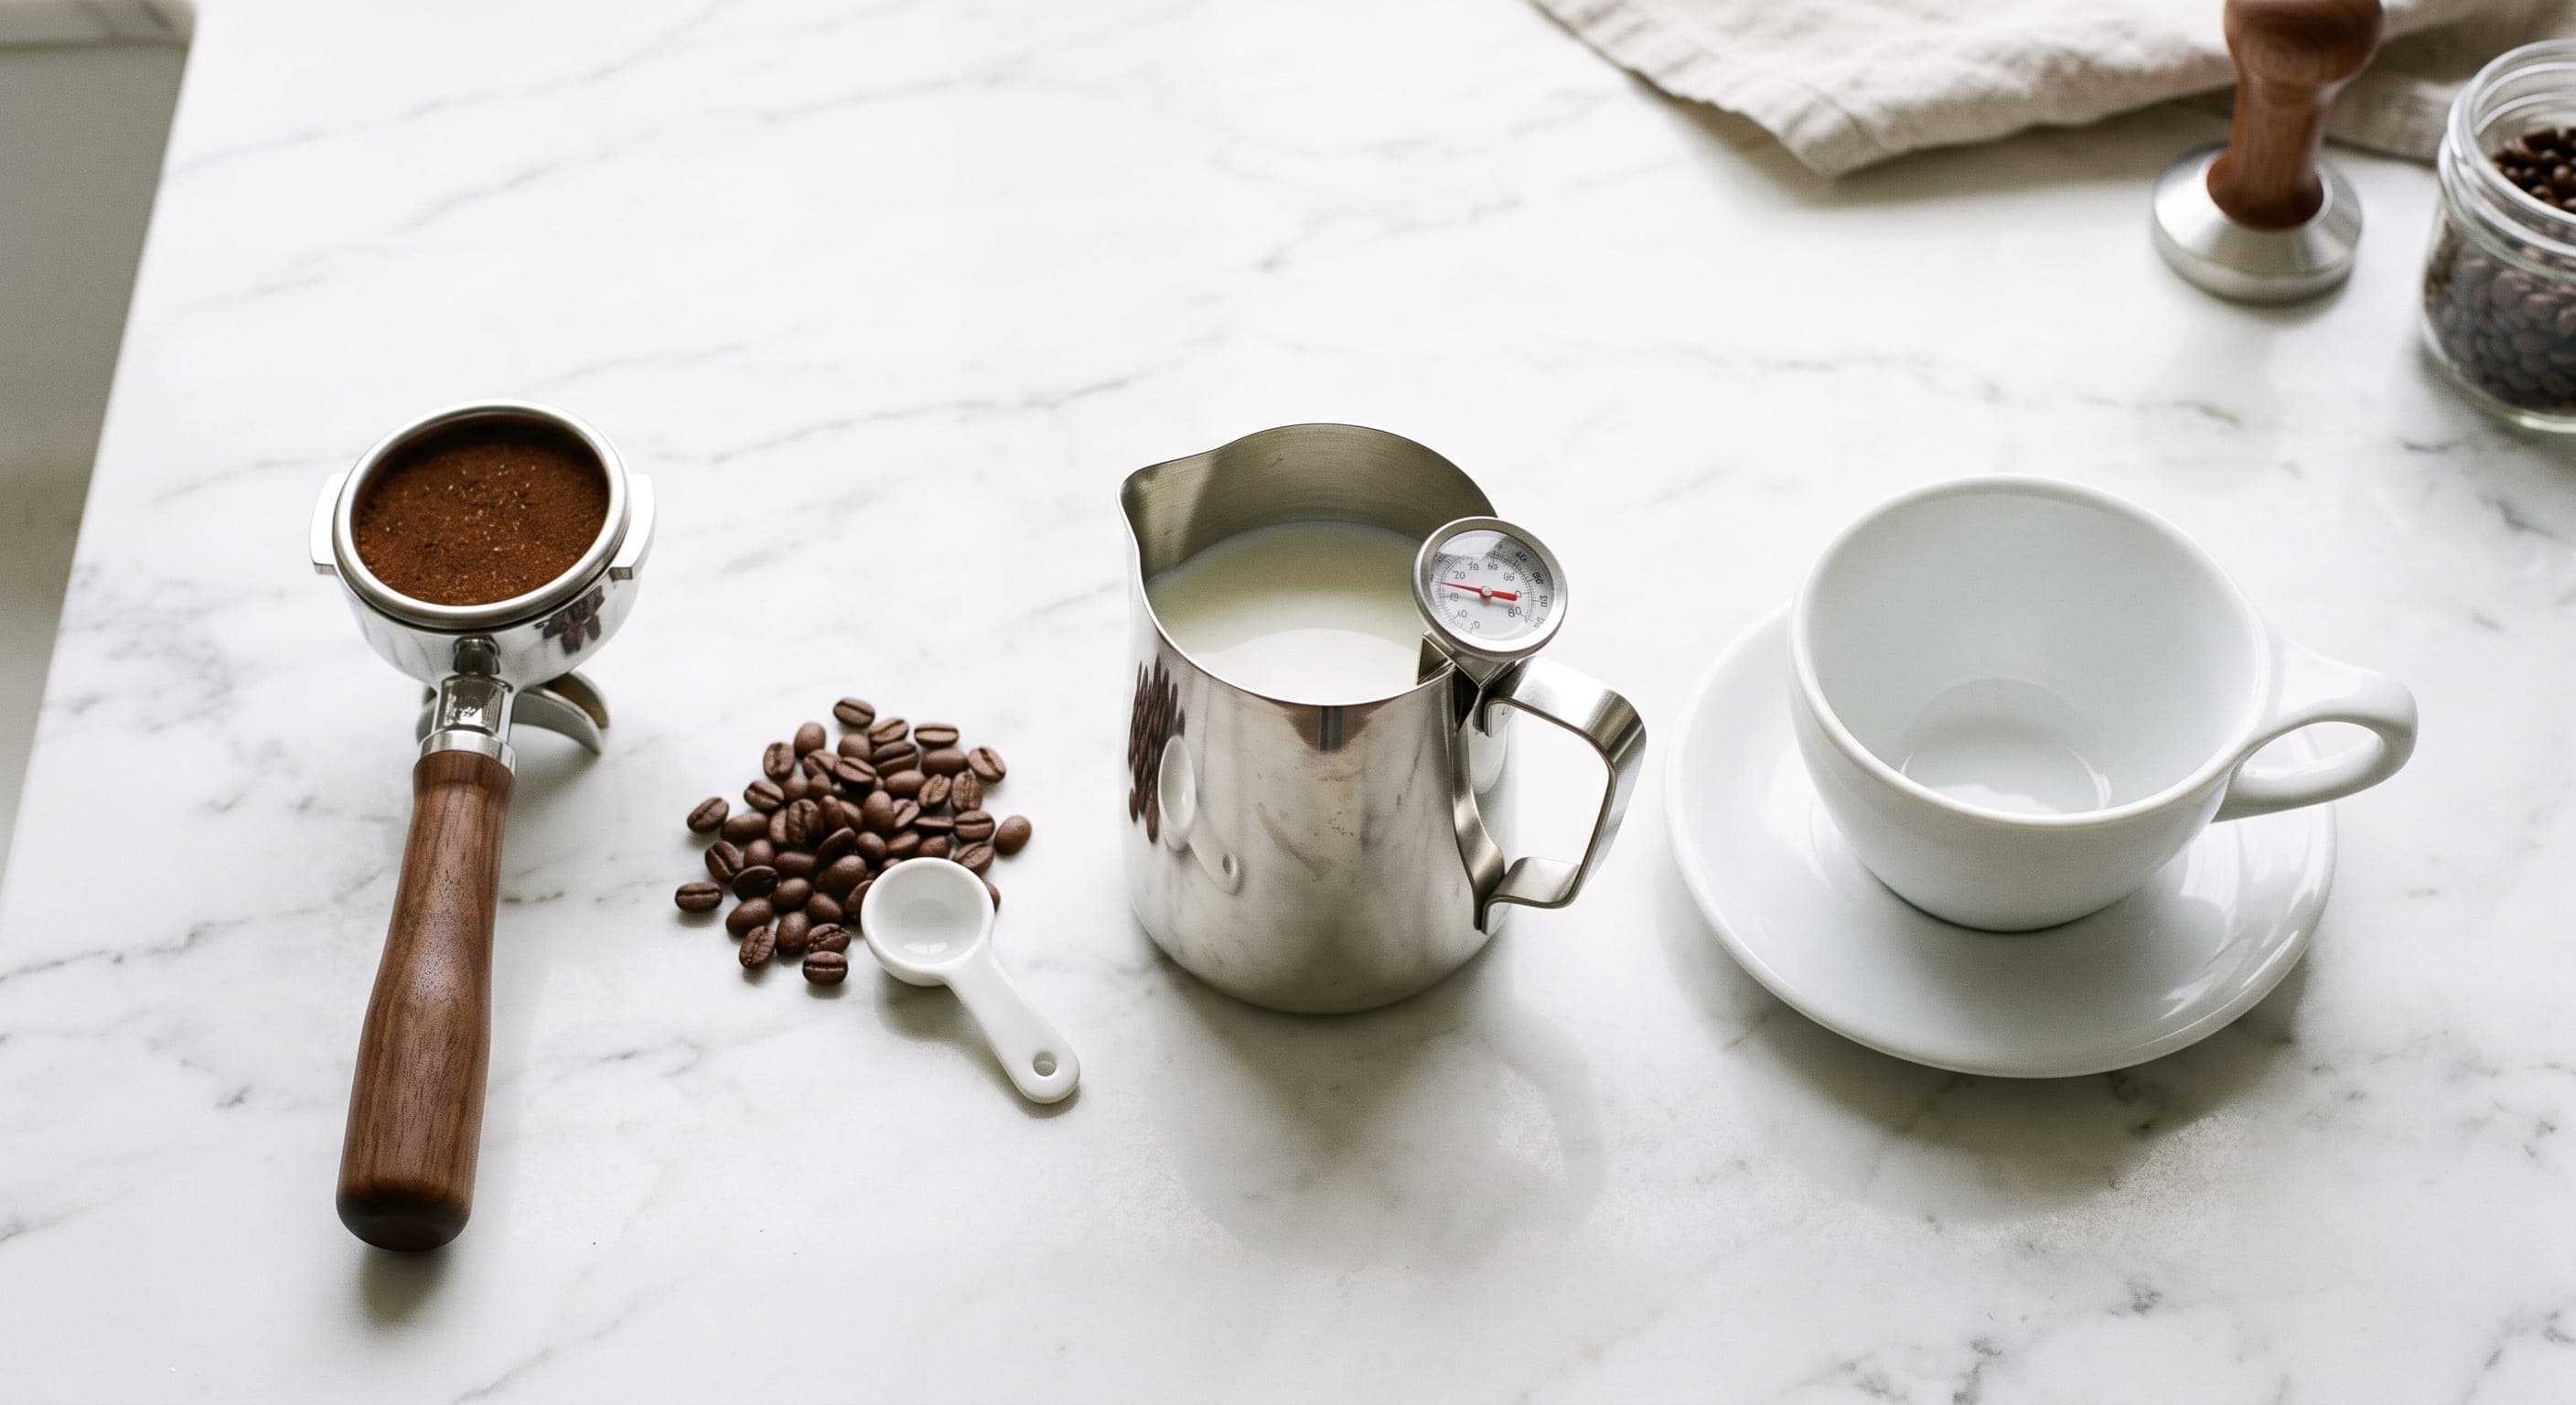
You don't need a commercial café setup. Here's the essential equipment and the budget-friendly alternatives.
Espresso Machine with Steam Wand
The standard tool. Any machine that pulls a proper 9-bar shot and has a steam wand will work. Entry-level options like the Breville Bambino Plus (~$299) or De'Longhi Dedica (~$179) are the most popular home latte setups. See our best espresso machines guide for tested picks.
Burr Grinder
Espresso requires a consistent fine grind that blade grinders cannot produce. A mid-range burr grinder like the Baratza Encore ESP or Fellow Opus will transform your latte quality more than almost any other upgrade.
Milk Steaming Pitcher
A 12–20 oz stainless steel pitcher with a pointed spout. The pointed spout is critical for latte art — it controls where the milk flows into the cup. For a standard single latte, a 12 oz pitcher is ideal: enough milk to texture without overheating a small volume.
Milk Thermometer
A clip-on metal stem thermometer ($8–$15) is the fastest way to calibrate your milk steaming until you can judge by touch. Target range: 60–65°C (140–150°F). Scorched milk above 70°C tastes flat and loses foam stability.
The Right Ratio: Espresso to Milk
The ratio is the single most important variable in latte-making — and the one most home brewers get wrong. Too much milk and the espresso disappears entirely. Too little and you have something closer to a cortado.
| Style | Espresso | Milk | Total | Character |
|---|---|---|---|---|
| Strong latte | 60 ml | 120 ml | ~180 ml | Espresso-forward, rich |
| Standard latte | 60 ml | 180 ml | ~240 ml | Balanced — most cafés |
| Milky latte | 60 ml | 240 ml | ~300 ml | Mild, great for beginners |
| Large café latte | 60 ml | 300 ml | ~360 ml | Very mild, large format |
My recommendation for most home brewers: start with a double shot (60 ml) and 180 ml of milk — the standard café ratio. If the latte tastes too strong, add 20 ml of milk next time. If it tastes flat or milky, reduce the milk or pull a stronger shot. The ratio is personal — calibrate it over a few brews rather than committing to one number permanently.
How to Make a Latte at Home — Step by Step
This is the full method for a double-shot latte using an espresso machine with a steam wand. Total time: under 5 minutes once your machine is warmed up.

Warm Up Your Machine and Cup
Run hot water through the group head and portafilter for 30 seconds before pulling your shot. Pre-warm your latte cup by filling it with hot water while you prepare — a cold cup drops the drink temperature by 5–10°C on contact, which noticeably dulls the milk sweetness.
Dose and Grind Your Coffee
Dose 18g of freshly ground coffee into the portafilter basket. Grind size should be fine — similar to table salt. Distribute evenly by tapping the portafilter, then tamp level and firm at approximately 30 lbs of pressure. The puck should be smooth and level. A crooked tamp causes channelling — water finds the path of least resistance and under-extracts the rest.
Pull Your Double Espresso Shot
Lock the portafilter and start the shot immediately. Target: 36–40g of liquid yield (about 60 ml) in 25–30 seconds. If the shot runs faster than 22 seconds, grind finer. If it stalls or drips beyond 35 seconds, grind coarser. A well-extracted shot should look honey-coloured with a reddish-brown crema and smell caramel-sweet, not sharp or ashy. Pour the espresso into your pre-warmed latte cup.
Fill the Pitcher and Purge the Wand
Fill your 12 oz pitcher with 180–200 ml of cold whole milk. Cold milk gives you more time to build texture before hitting temperature. Open the steam valve for 1–2 seconds to purge any condensed water before touching the milk — water in the wand dilutes the milk and creates large uneven bubbles.
Steam and Texture the Milk
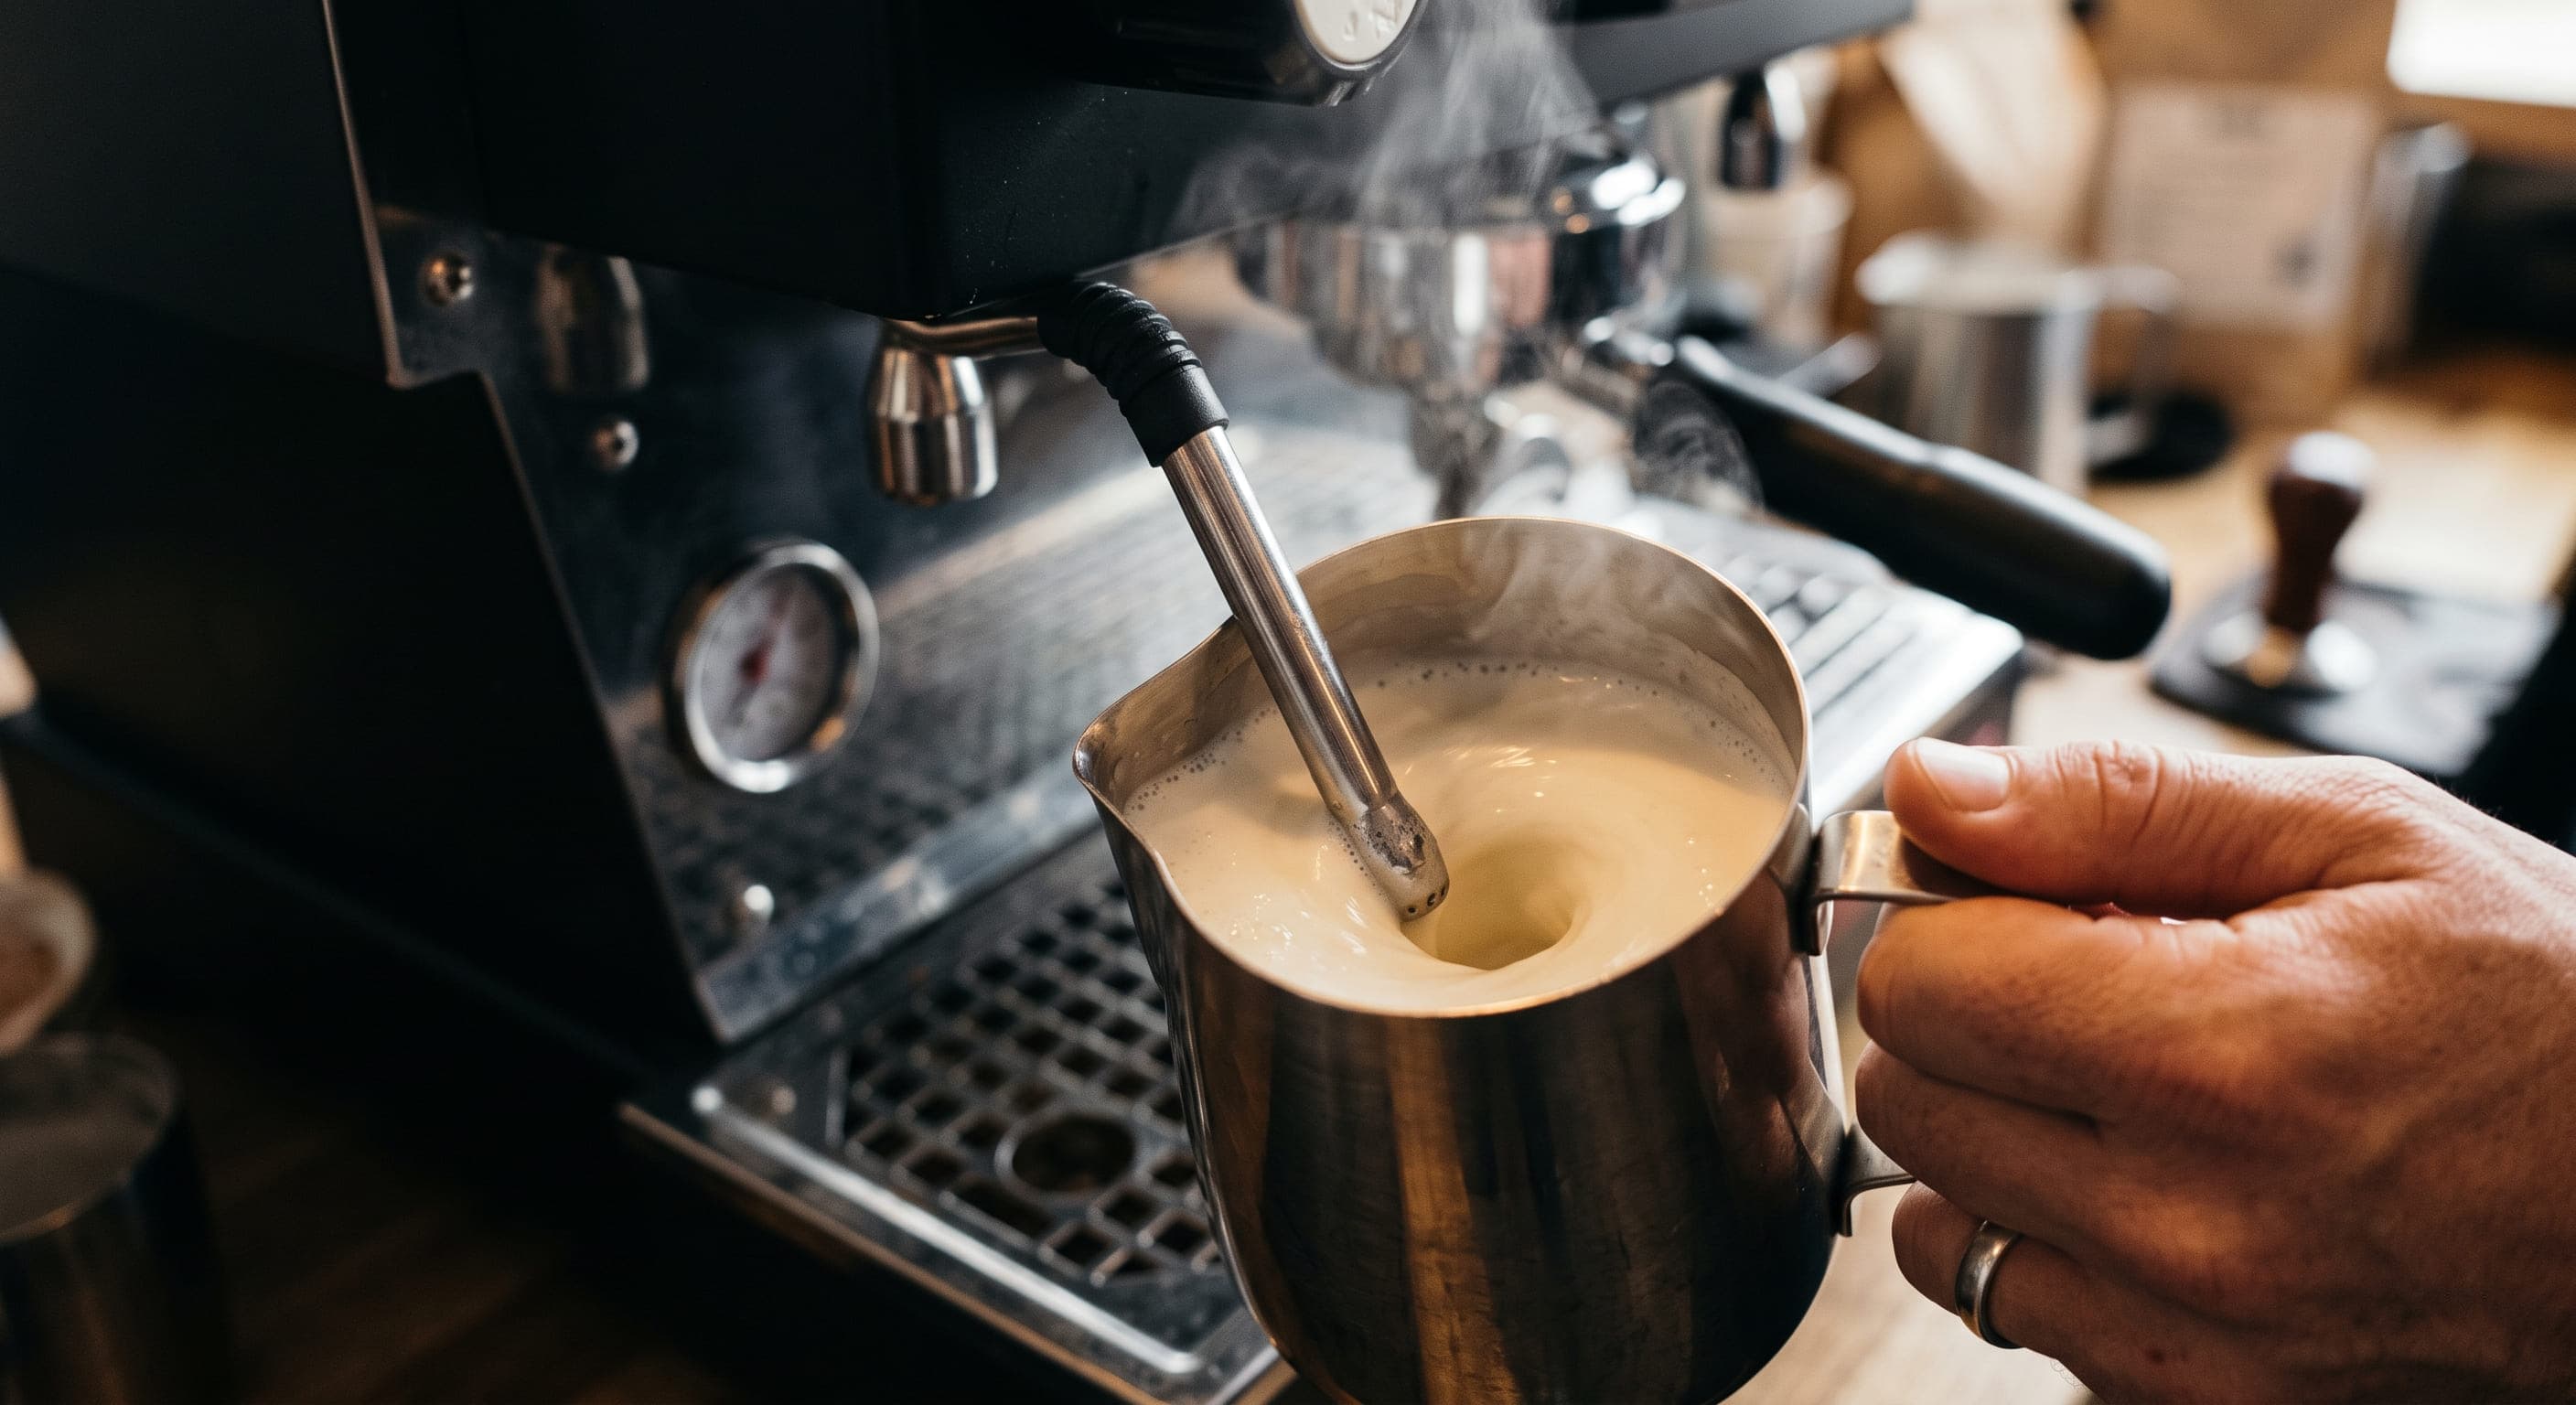
Submerge the steam tip 1–2 cm below the milk surface, slightly off-centre toward the side of the pitcher to create a clockwise vortex. Open the steam valve fully. For the first 3–5 seconds, lower the pitcher slightly so the tip is just at or slightly above the milk surface — this introduces air and creates the microfoam. You should hear a gentle "tss-tss" paper-tearing sound, not a loud screech. Once you have adequate foam volume, submerge the tip deeper and continue heating while maintaining the vortex. Stop at 60–65°C (140–150°F). Close the steam valve, remove the pitcher.
Tap and Swirl the Milk
Tap the base of the pitcher on the counter 2–3 times to pop any large surface bubbles, then swirl the pitcher in a circular motion for 10–15 seconds. This integrates the foam and milk into a uniform, glossy, paint-like texture. If you can see large bubbles, keep swirling until they disappear. Well-textured milk should look like wet white paint — smooth and reflective with no visible foam layer.
Pour and Serve
Tilt the latte cup slightly toward you. Start the pour from about 10 cm above the cup — this height allows the heavier steamed milk to sink under the crema and blend with the espresso. Once the cup is about halfway full, bring the pitcher spout close to the surface (1–2 cm) and increase the pour speed slightly. The microfoam will begin to float onto the surface. For a simple latte art heart: as the cup fills to near the top, move the pitcher spout slightly back and forth while slowing the pour. Serve immediately.
How to Steam Milk for a Latte — The Technique Explained
Milk steaming is the skill that separates a home latte from a café latte. Most beginners either create stiff, bubbly froth (too much air introduction) or flat, hot milk (not enough air). Proper latte milk falls between these extremes: silky, velvety microfoam that is fully integrated into the liquid rather than sitting on top as a separate layer.

What Good Microfoam Looks Like
- ✓Glossy, paint-like surface — reflective, no visible bubbles
- ✓Milk and foam fully integrated — no separation
- ✓Thick enough to slowly pour, not splash
- ✓Tastes sweet — natural milk sugars developed by heat
- ✓Temperature 60–65°C — hot but not scalding
Common Steaming Mistakes
- ✗Loud screeching sound — tip too high, creating large bubbles
- ✗Stiff, dry froth — too much air introduced too late
- ✗Flat hot milk — tip too deep, no air introduced at all
- ✗Burning taste — milk taken above 70°C (160°F)
- ✗Not purging wand — water in wand dilutes milk and foam
Choosing the Right Milk for Your Latte
Milk choice affects foam quality, sweetness, body, and overall flavour more than most home brewers expect. Here's how the most common options compare:
Whole Milk (3.5% fat)
★★★★★Naturally sweet, creamy. The gold standard for lattes. Fat content creates stable, silky microfoam that integrates beautifully and enhances espresso sweetness.
Semi-Skimmed (1.5–2% fat)
★★★★☆Lighter than whole milk. Foam is slightly less stable but works well. Good if you want fewer calories without sacrificing texture.
Oat Milk (barista edition)
★★★★☆Best non-dairy option. Oatly Barista and Minor Figures are formulated to foam at steam temperatures. Slightly sweet, neutral flavour that doesn't compete with espresso.
Skimmed Milk (0% fat)
★★★☆☆Creates large foam volume but bubbles are unstable and collapse quickly. Tastes watery in a latte. Best avoided for milk-forward drinks.
Almond Milk
★★★☆☆Thin body and difficult to foam — most brands separate under steam heat. Barista almond milks (Califia Barista Blend) work better but still produce weaker foam than oat milk.
Soy Milk
★★★☆☆Foams reasonably well and creates medium body. Slight beany flavour can compete with light-roast espresso. More neutral with dark roasts.
How to Make a Latte Without an Espresso Machine
You can make a very good latte-style drink without a full espresso machine. Here are the three best methods, ranked by quality of result:
1. Moka Pot + Handheld Frother (Best No-Machine Method)
Brew a concentrated Moka pot shot using 15–18g of finely ground coffee in a 3-cup Moka pot. Use the smallest Moka pot you own for maximum concentration. The result (about 60–80 ml) is strong, bitter, and espresso-like — not identical, but the closest manual substitute. While the Moka pot brews, heat 180 ml of milk in a small saucepan to 60°C. Pour into a jar or large cup and froth vigorously with a handheld electric frother (30 seconds). Pour Moka pot coffee into your cup, then pour frothed milk on top.
For more on the Moka pot brewing method, see our how to use a Moka pot guide.
2. AeroPress + Handheld Frother
Use the inverted AeroPress method with 18–20g of finely ground coffee, 60 ml of water at 90–95°C, and a 30–40 second steep before pressing firmly. The resulting concentrate is espresso-adjacent — no crema, slightly different body, but strong and flavourful enough to hold up in a latte. Froth heated milk separately with a handheld frother and combine as above.
3. Strong Drip Coffee + Milk Frother (Budget Method)
Brew a small, very strong drip coffee using double the normal coffee dose (30g per 240 ml instead of 15g). Use 60–80 ml of this strong drip in place of espresso. The taste will be noticeably different — more bitter, less body — but with a good milk froth and the right ratio, it makes a passable latte-style drink. This method works best with dark roast commercial coffee.
Latte vs Cappuccino: Key Differences
These two drinks are often confused because they use the same espresso base. The difference is entirely in the milk:
Latte
- →Large milk volume — 150–240 ml of steamed milk per double shot
- →Thin 5–10 mm microfoam layer — integrated, not separate
- →Mild, creamy, milk-forward character
- →240–300 ml total — the largest espresso milk drink
- →Best canvas for latte art — large surface area, stable microfoam
Cappuccino
- →Small milk volume — 60–80 ml of steamed milk per double shot
- →Thick 1–2 cm foam — drier, airier texture than a latte
- →Stronger, more balanced espresso character
- →150–180 ml total — a smaller, more intense drink
- →Traditional Italian after-breakfast drink
For a full breakdown of all three major milk drinks, see our Flat White vs Cappuccino vs Cortado comparison.
Latte Variations to Try at Home
Once you have the standard latte dialled in, these variations are easy to add:
Vanilla Latte
Add 1–2 pumps (15–30 ml) of vanilla syrup to the espresso before adding milk. Make vanilla syrup at home: equal parts sugar and water simmered with a split vanilla bean or 1 tsp vanilla extract.
Oat Milk Latte
Substitute whole milk with barista oat milk (Oatly Barista, Minor Figures). Steam at the same temperature. Naturally sweeter and slightly nuttier — pairs especially well with medium roast single-origins.
Iced Latte
Pull your double shot directly over a cup filled with ice. Add 150–180 ml of cold milk (no steaming). Stir and serve immediately. For the full method, see our iced latte guide.
Brown Sugar Oat Milk Latte
Add 1–2 tsp of brown sugar and a pinch of cinnamon to the espresso while hot. Stir until dissolved, then add steamed oat milk. The Starbucks-inspired version that's genuinely better made at home.
Lavender Latte
Add 1–2 tsp of culinary-grade lavender syrup (simmer dried lavender buds in simple syrup for 10 minutes, strain) to the espresso. Works best with light-roast Ethiopian beans where the floral notes complement the lavender.
Matcha Latte (Latte-Style)
Whisk 2 tsp of ceremonial-grade matcha with 30 ml of hot water. Add steamed milk as normal. This is technically not a coffee latte but follows the same preparation structure and is increasingly popular.
Common Latte Mistakes and How to Fix Them
Latte tastes watery or flat
Almost always a ratio problem. Switch to a double shot if using a single, or reduce milk volume. Check your espresso extraction — a sour, thin shot will taste lost in milk.
Milk is stiff and bubbly, not silky
Too much air introduced during steaming, or air introduced too late (after milk is already warm). All air should be added in the first 3–5 seconds while milk is still cold. Try again from cold milk.
Milk burns or tastes flat
Milk scalded above 70°C. Use a thermometer. Once you've hit 65°C, stop immediately — the residual heat in the pitcher will continue warming milk slightly even after the wand is removed.
Latte art won't form
Usually a texture issue — milk isn't fully integrated or has large bubbles. Keep swirling after steaming until the surface is completely smooth and reflective before pouring.
Espresso tastes sour or thin
Under-extraction. Grind finer and check your dose is 18g. Shot should run 25–30 seconds. See our full guide on how to fix bitter or sour espresso.
Drink cools too fast
Pre-warm your latte cup with hot water before pulling the shot. A cold cup drops drink temperature significantly on contact.
Frequently Asked Questions
A standard café latte uses a 1:4 to 1:6 ratio of espresso to steamed milk — typically one or two espresso shots (30–60 ml) with 150–240 ml of steamed milk and a thin 5–10 mm layer of microfoam on top.
Most specialty cafés use a double shot (60 ml) with 180–200 ml of milk, producing a 240 ml drink.
At home, starting with a 1:4 ratio (double shot + 120 ml milk) gives a strong, espresso-forward latte; 1:6 gives a milkier, gentler cup.
Final Thoughts
A great homemade latte comes down to three things: a properly extracted double shot, silky integrated microfoam, and the right espresso-to-milk ratio. Get those three right and your home latte will compete with most cafés. The skills — especially milk steaming — take repetition to develop, but they click fast once you understand what you're listening and looking for.
Start with whole milk, a double shot, and 180 ml — the standard ratio. If you enjoy the result, keep it. If not, adjust one variable at a time. More milk makes it gentler; less makes it stronger. Once the base latte is dialled in, the variations — vanilla, oat milk, iced — are simple extensions of the same technique.
Ready to go further? Our iced latte guide covers the cold version in detail. For the equipment behind the latte, see our best espresso machines and best coffee grinders — both tested hands-on by our barista team. And if you want to understand how the latte compares to the cappuccino and cortado, our macchiato vs latte guide is the natural next read.
Get Coffee Tips
Join our newsletter for expert reviews and brewing guides.