Barista spooning thick domed foam onto a double espresso to finish a traditional cappuccino in a wide white porcelain cup on a wooden café counter

How to Make a Cappuccino at Home — Step-by-Step Barista Guide (2026)

An SCA Level 2 barista trainer breaks down the 1:1:1 ratio, the difference between dry and wet style, and the exact milk technique that makes a cappuccino a cappuccino

By Michael Anderson
Last Updated: August 27, 2026
10 min read
Expert Reviewed

A cappuccino is the most technique-dependent drink in espresso — and the easiest to get wrong at home. Most people who attempt it either produce a latte with too much milk or a cup of stiff froth sitting on top of espresso with no integration at all. Neither is a cappuccino.

I've trained baristas for over 15 years and judged cappuccino technique in SCA competitions. The cappuccino is unforgiving: the espresso-to-milk volume is small enough that every variable — shot quality, foam texture, pour order, cup size — is immediately noticeable. But that same constraint makes it the fastest drink to master once you understand what you're aiming for.

This guide covers the correct 1:1:1 ratio, step-by-step steaming technique for cappuccino foam (which is different from latte microfoam), dry vs wet style, how to make a cappuccino without an espresso machine, and the most common mistakes and fixes. Whether you're using a home espresso machine or a Moka pot and frother, you'll understand exactly what a cappuccino should be and how to make it.

Finished homemade cappuccino in a wide 6 oz white porcelain cup — thick domed foam cap rising 1.5 cm above the rim with a light espresso-coloured halo around the edge, on a white marble counter

Cappuccino at a Glance

A cappuccino (Italian: cappuccino — from the Capuchin friars, whose robes matched the drink's colour) is a double espresso with equal parts steamed milk and thick milk foam. It is smaller, stronger, and airier than a latte — the espresso flavour is far more prominent because the milk volume is roughly half that of a latte.

Quick Reference

  • Espresso: 1 double shot — 18g coffee, 60 ml yield
  • Steamed milk: ~60 ml
  • Milk foam: ~60 ml thick, domed — 1–2 cm above rim
  • Ratio: 1:1:1 (espresso : steamed milk : foam)
  • Milk temperature: 55–65°C (130–150°F)
  • Total drink size: 150–180 ml
  • Cup size: 5–6 oz wide-mouth porcelain
  • Brew time: Under 5 minutes
ComponentCappuccinoLatteFlat White
Espresso60 ml (double)60 ml (double)60 ml (double)
Steamed milk~60 ml150–240 ml100–120 ml
Foam1–2 cm thick cap5–10 mm thin microfoamThin sheet only
Total volume150–180 ml240–300 ml160–180 ml
Espresso characterStrong — prominentMild — milk-forwardMedium — forward

What You Need to Make a Cappuccino at Home

01

Espresso Machine with Steam Wand

Any machine that pulls a true 9-bar shot and has a steam wand. The steam wand is non-negotiable for a proper cappuccino — you need its pressure to produce thick, dense foam. Entry-level machines like the Breville Bambino Plus or De'Longhi Dedica work well. See our tested picks in the best espresso machines guide.

02

12 oz Milk Steaming Pitcher

A 12 oz stainless steel pitcher is ideal for a single cappuccino — enough milk to generate foam without steaming too small a volume (which overheats fast). A pointed spout gives better pour control when adding the steamed milk layer before the foam cap.

03

Burr Grinder

Cappuccino espresso needs a consistent fine grind. A blade grinder produces inconsistent particle sizes that cause uneven extraction — shots pull too fast or too slow and taste flat or harsh. A mid-range burr grinder is the highest-impact upgrade for home espresso quality.

04

Wide-Mouth Cappuccino Cup (5–6 oz)

A wide, low 5–6 oz porcelain cup is essential. The wide mouth is what allows the foam cap to dome above the rim — a narrow tall cup won't give you the classic cappuccino profile. Thick-walled porcelain also retains heat better than glass. Pre-warm it before pulling your shot.

05

Milk Thermometer

Cappuccino milk is steamed to 55–65°C — a narrower target than a latte because you want more foam incorporated, and correct temperature is critical. A clip-on metal stem thermometer ($8–$15) calibrates your hand faster than trial and error.

Affiliate Disclosure: This page contains affiliate links. We may earn a commission when you make a purchase through our links, at no additional cost to you. This helps us keep our content free and up-to-date. Learn more in our affiliate disclosure policy.

Recommended Equipment for Cappuccino at Home

Our team's tested picks for every budget — from the espresso machine to the cup.

Best Overall Pick

Breville Bambino Plus

Compact espresso machine with auto steam wand — pulls 9-bar shots and produces excellent cappuccino microfoam. Our top pick for home cappuccino makers.

~$399–$449

Best Budget Pick

De'Longhi Dedica EC685

Slim, affordable espresso machine with a manual steam wand. Produces real espresso pressure at an entry-level price — ideal for first cappuccino setups.

~$200–$250

The Correct Cappuccino Ratio: 1:1:1

The defining characteristic of a cappuccino is the 1:1:1 ratio — equal thirds espresso, steamed milk, and milk foam. In absolute terms for a standard home cappuccino:

  • Espresso: 60 ml (double shot, 18g dose)
  • Steamed milk: 60 ml
  • Foam: 60 ml (thick, dense)
  • Total: ~180 ml in a 5–6 oz cup

The practical challenge is that unlike a latte — where you pour all the textured milk in one motion — a cappuccino requires you to first pour the steamed milk and then spoon the foam on top as a separate layer. This is why the technique differs significantly from latte-making.

StyleEspressoSteamed MilkFoamCharacter
Bone Dry60 ml0 ml~90 mlEspresso + foam only — very intense
Dry60 ml30 ml90 mlMore foam, less milk — airy, intense
Traditional (1:1:1)60 ml60 ml60 mlBalanced — the Italian standard
Wet60 ml90 ml30 mlMore milk — smoother, closer to latte

How to Make a Cappuccino at Home — Step by Step

Full method for a traditional 1:1:1 cappuccino using an espresso machine. Total time: under 5 minutes once warmed up.

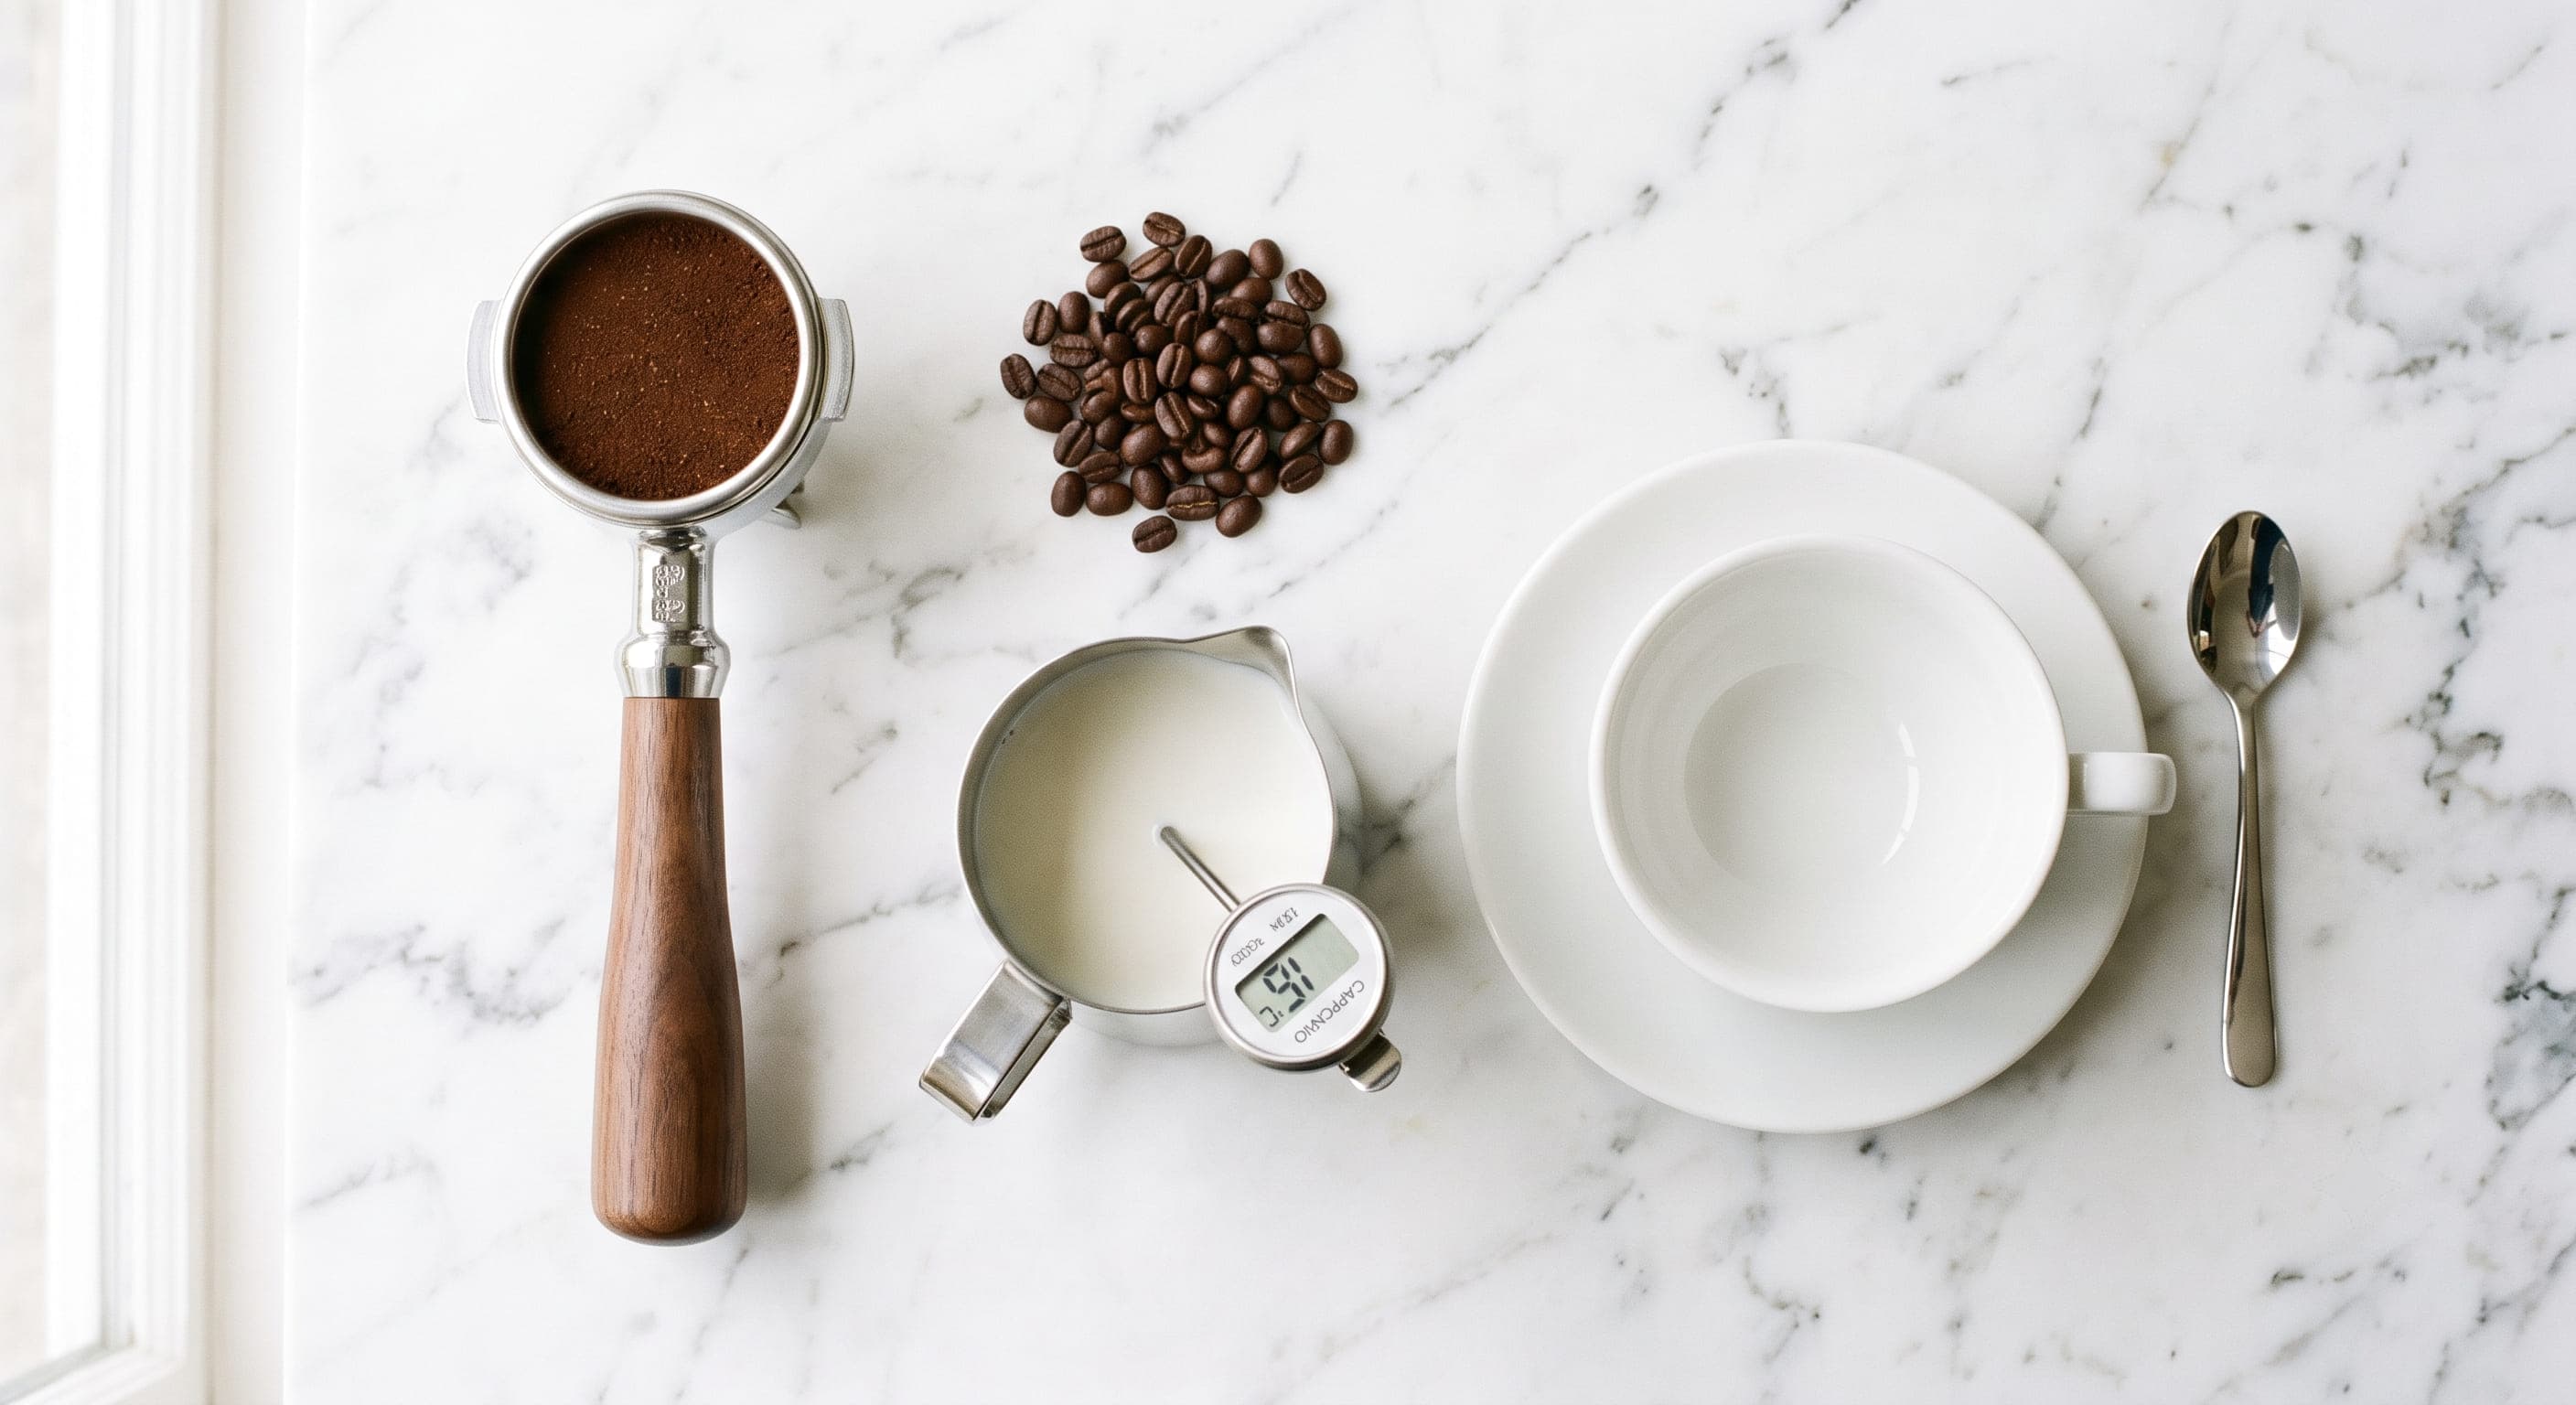
Cappuccino ingredients laid out on a white marble counter — portafilter with ground coffee, 12 oz stainless steel milk pitcher with whole milk, wide 6 oz white porcelain cappuccino cup, milk thermometer
01

Pre-Warm Your Cup

Fill a 5–6 oz wide-mouth cappuccino cup with hot water from the group head or kettle. Let it sit while you pull the shot. Empty and dry the cup just before pouring. A pre-warmed cup holds heat and prevents the espresso from dropping more than a few degrees on contact.

02

Dose, Grind, and Tamp

Dose 18g of freshly ground coffee into your portafilter basket. The grind should be fine — similar to table salt. Distribute evenly across the basket, then tamp level and firm at ~30 lbs pressure. The puck surface should be smooth and flat. An uneven tamp causes channelling — water rushes through weak spots and the shot extracts unevenly.

03

Pull Your Double Espresso

Lock the portafilter and start the shot immediately. Target: 36–40g of liquid yield in 25–30 seconds. A honey-coloured crema with a reddish-brown hue indicates good extraction. Sour, thin, or very pale shots mean under-extraction (grind finer); dark, bitter, ashy shots mean over-extraction (grind coarser). Pour directly into the pre-warmed cup.

04

Fill the Pitcher and Purge the Wand

Add 120–130 ml of cold whole milk to a 12 oz pitcher. More than this makes it hard to control the foam volume at cappuccino proportions. Purge the steam wand for 1–2 seconds before submerging — this clears any condensed water that would dilute the milk and produce large uneven bubbles.

05

Steam the Milk with More Air Than a Latte

Submerge the steam tip 1–2 cm below the surface, slightly off-centre. Open the valve fully. For a cappuccino, introduce air for 5–8 seconds — significantly longer than the 3–5 seconds you'd use for a latte. You're building more foam volume intentionally. Listen for the gentle "tss-tss" sound. Once the foam volume has expanded noticeably, submerge the tip deeper and complete heating to 55–65°C (130–150°F). Close the valve and remove the pitcher.

06

Tap, Swirl, and Rest

Tap the base of the pitcher on the counter 2–3 times to pop any large surface bubbles. Swirl vigorously in a circular motion for 10–15 seconds. Unlike a latte where all foam is integrated, cappuccino milk should separate into a clear steamed milk layer on the bottom and a thick foam layer on top as it rests for 10–15 seconds. This separation is what you'll use to your advantage when pouring.

07

Pour the Milk, Then Spoon the Foam

Hold the pitcher at a slight angle. Gently pour the steamed milk from the bottom of the pitcher into the espresso — the steamed milk flows first while the foam stays back. Fill the cup to about two-thirds. Then use a spoon to scoop the remaining foam from the pitcher onto the top of the drink, building a domed cap that rises 1–2 cm above the cup rim. The foam should be thick enough to hold its shape for 30–60 seconds without collapsing into the liquid beneath.

08

Serve Immediately

A cappuccino should be served and drunk within 2–3 minutes of making. The foam begins to degrade after that — bubbles at the base collapse into the liquid, losing the textural contrast between the creamy espresso-milk base and the airy foam cap. In Italian café culture, a cappuccino is a morning drink consumed standing at the bar within minutes of ordering.

Milk Steaming for a Cappuccino vs a Latte

The key difference between steaming milk for a cappuccino versus a latte is air volume. A latte uses silky, fully integrated microfoam — almost no visible foam layer. A cappuccino needs a thick, separable foam cap that can be spooned. This means you introduce significantly more air during steaming.

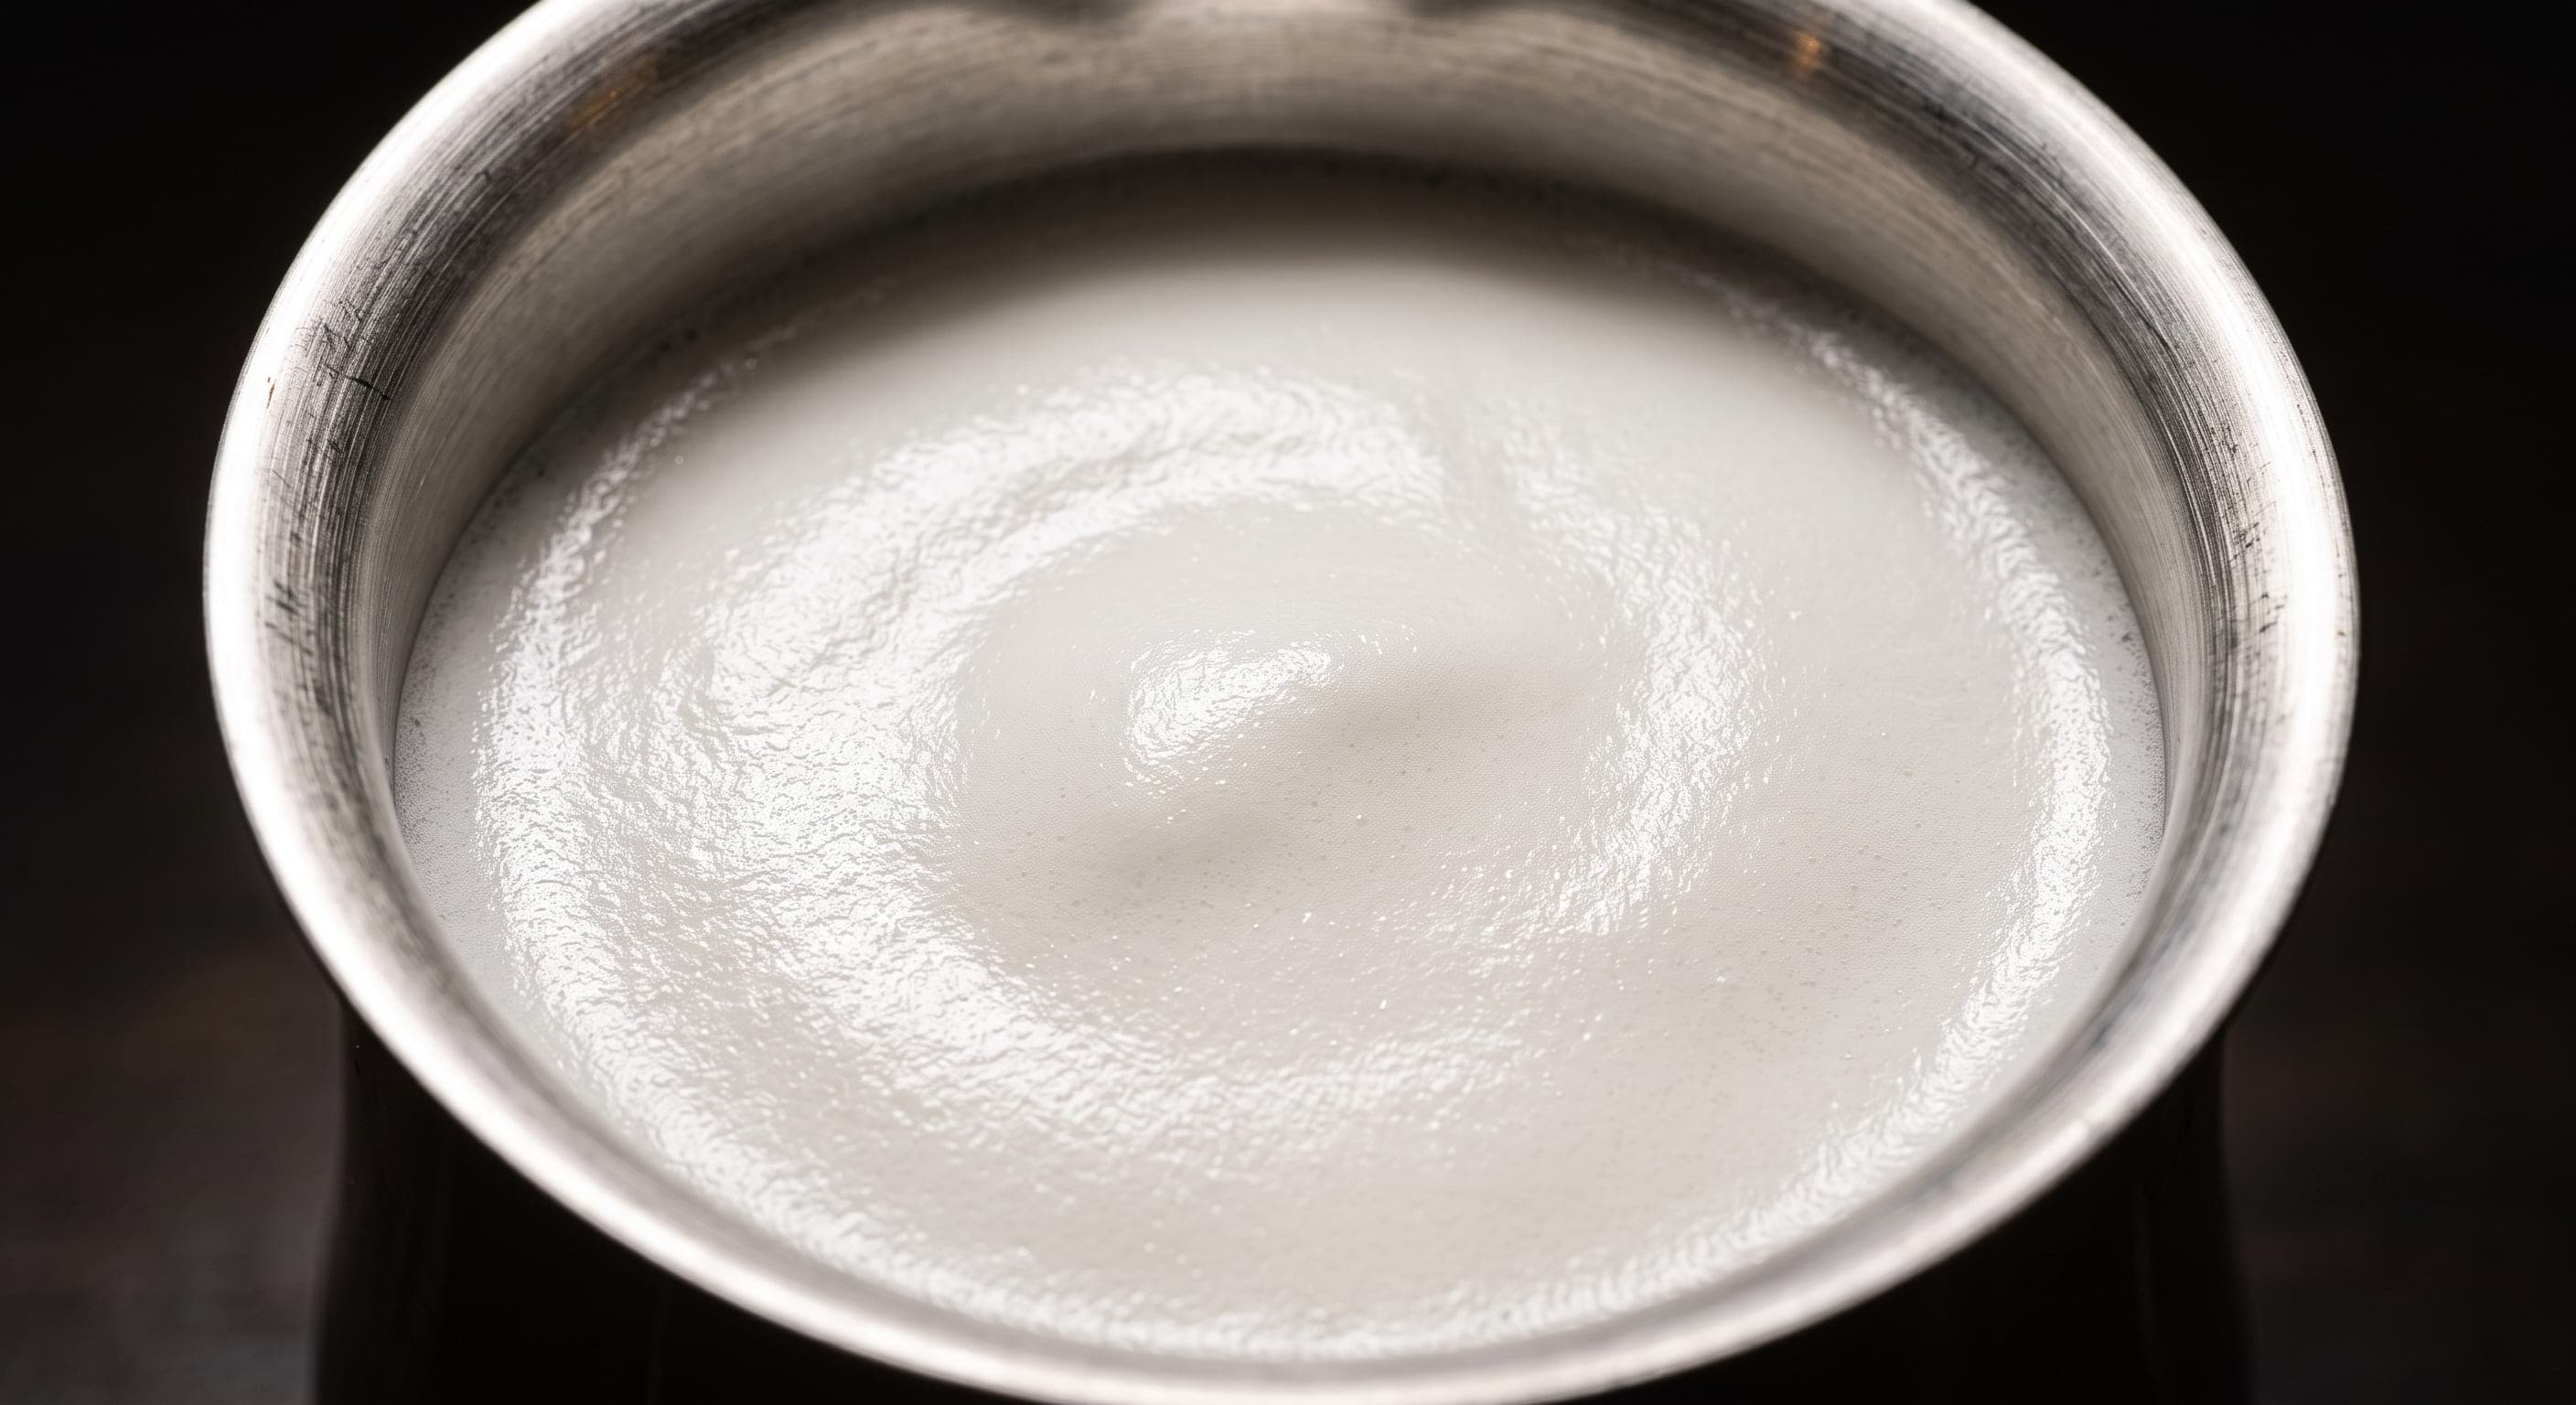
Close-up of correctly textured cappuccino milk foam in a stainless steel pitcher — thick, dense, glossy white foam with no visible large bubbles, showing the correct texture for a traditional cappuccino foam cap

Cappuccino Milk Target

  • 5–8 seconds of air introduction (vs 3–5 for latte)
  • Foam volume expands visibly — milk fills ~70% of pitcher
  • Temperature: 55–65°C (130–150°F)
  • After swirling: separates into milk base + thick foam top
  • Foam holds shape when spooned — doesn't collapse

Latte Milk Target (for comparison)

  • 3–5 seconds of air introduction
  • Foam volume expands slightly — mostly liquid
  • Temperature: 60–65°C (140–150°F)
  • After swirling: fully integrated — no visible foam layer
  • Pours as a unified liquid — glossy, paint-like

Dry vs Wet Cappuccino: Which Should You Make?

“Dry” and “wet” describe where on the milk-to-foam spectrum your cappuccino falls. This is a personal preference — not a quality judgement.

Dry Cappuccino

More Foam
  • ·Less steamed milk, more foam — sometimes no steamed milk at all
  • ·Foam cap can be 2–3 cm above the rim
  • ·Lighter, more airy texture
  • ·Espresso flavour is most prominent
  • ·Closer to the traditional Italian style
  • ·Good if you find standard cappuccino too milky

Traditional (1:1:1)

Balanced
  • ·Equal thirds espresso, milk, and foam
  • ·1–2 cm domed foam cap
  • ·Balance between espresso intensity and milk creaminess
  • ·The standard café default
  • ·Best starting point for home brewers
  • ·Widest appeal — works for most palates

Wet Cappuccino

More Milk
  • ·More steamed milk, less foam
  • ·Thin foam layer — similar to a latte
  • ·Smoother, creamier texture
  • ·Espresso is less prominent
  • ·Sometimes called a "milky cappuccino"
  • ·Good transition drink for latte drinkers

My recommendation for beginners: start with the traditional 1:1:1. Once you've made it 5–10 times and understand the baseline, adjust one way or the other based on preference. Introduce more or less air during steaming to shift the foam volume, rather than changing the espresso dose.

How to Make a Cappuccino Without an Espresso Machine

A true cappuccino requires 9-bar extraction — but you can make a very acceptable version with these alternatives:

1. Moka Pot + Handheld Frother (Best No-Machine Method)

Brew the strongest possible Moka pot shot: use a 3-cup Moka pot with 15–18g of finely ground coffee (finer than standard Moka grind) and fill the water chamber just to the valve. The result is 60–80 ml of concentrated, espresso-like coffee. While it brews, pour 120 ml of cold whole milk into a jar and use a handheld electric frother for 30–45 seconds — more vigorously than for a latte — to produce a thick, stiff foam. Let it rest 15 seconds to separate, then pour the liquid milk layer over the Moka coffee and spoon the foam cap on top.

See our Moka pot brewing guide for detailed technique.

2. Nespresso + Aeroccino Frother

Brew a double espresso pod (or two single pods) to 60 ml. Use the Aeroccino on the cappuccino/foam setting — the whisk at this setting produces a thicker, drier foam than the latte setting. Pour the espresso into a pre-warmed 5–6 oz cup, add the steamed milk layer, then spoon the foam cap. This produces a consistently decent cappuccino, though capsule espresso lacks the crema of freshly ground coffee.

3. French Press Foam Method (Budget Option)

Heat 120 ml of whole milk to 60–65°C in a saucepan. Pour into a French press and pump the plunger rapidly 20–30 times — the mesh forces air through the milk and creates foam. Rest for 10 seconds, then pour the liquid milk first and spoon the foam on top of a strong Moka pot or AeroPress concentrate. Lower foam quality than a steam wand but usable in a pinch with no equipment cost.

Cappuccino vs Latte: The Key Differences

Both use a double espresso base. Everything else is different:

Cappuccino

  • 150–180 ml total — small and intense
  • Equal thirds espresso, milk, foam
  • Thick 1–2 cm foam cap — separate layer
  • Strong espresso character — milk is supporting
  • Wide-mouth 5–6 oz porcelain cup
  • Italian tradition: morning only, drunk standing

Latte

  • 240–300 ml total — large and creamy
  • 1:4 to 1:6 espresso-to-milk ratio
  • 5–10 mm microfoam — fully integrated
  • Mild, milk-forward — espresso is background
  • Tall glass or wide bowl cup
  • Any time of day — leisurely drink

The short version: if you want to taste the espresso prominently, choose a cappuccino. If you want a creamy, comforting drink where the coffee is in the background, choose a latte. For more detail on how these compare to other milk drinks, see our macchiato vs latte guide and flat white vs cappuccino vs cortado comparison.

Cappuccino Variations to Try at Home

Iced Cappuccino

Pull a double shot over ice in a 12 oz glass. Add 60 ml of cold milk and spoon stiff cold foam (frothed from cold milk with a handheld frother) on top. Not traditional but increasingly popular in warmer months.

Cappuccino Scuro (Dark)

A drier cappuccino with more foam and less steamed milk than the standard — the espresso flavour is most intense. A common Italian variation for those who find the 1:1:1 too mild.

Cappuccino Chiaro (Light)

The opposite — more steamed milk, less foam, essentially a wet cappuccino. Closer to a latte but served in a smaller cup. Preferred by those transitioning from latte to cappuccino.

Flavoured Cappuccino

Add 1 pump (15 ml) of vanilla, hazelnut, or caramel syrup to the espresso before adding milk. The smaller milk volume of a cappuccino means flavoured syrups are more prominent than in a latte — start with half a pump.

Oat Milk Cappuccino

Substitute whole milk with barista oat milk (Oatly Barista, Minor Figures). Steam at the same temperature. Slightly sweeter and less creamy than whole milk — produces good foam that holds for a cappuccino cap.

Cinnamon Cappuccino

Dust the finished foam cap with a small pinch of ground cinnamon or cocoa powder. Traditional in many European café cultures. The spice sits on the foam and releases aroma as you drink without altering the liquid.

Common Cappuccino Mistakes and How to Fix Them

Problem

Foam collapses immediately into the milk

Fix

Not enough air was introduced during steaming. Increase air introduction time to 5–8 seconds. The foam needs to be dense and stiff enough to hold its shape when spooned — test with the spoon test before pouring.

Problem

Foam is stiff and dry like shaving cream

Fix

Too much air introduced, or large bubbles not eliminated. Swirl and tap more aggressively after steaming. Also try introducing air for slightly less time — aim for integrated microfoam that happens to have more volume, not separate dry froth.

Problem

The drink is too small / looks half-filled

Fix

Cappuccino uses a 5–6 oz cup specifically because of the ratio — a 150–180 ml drink in a 12 oz mug looks undersized. Use the correct cup size. A cappuccino should fill a 5–6 oz cup with the foam domed above the rim.

Problem

Milk tastes flat or slightly burnt

Fix

Milk was scalded above 70°C. Use a thermometer and stop at 65°C maximum. Residual pitcher heat will carry the temperature 2–3 degrees higher after the wand is removed.

Problem

Espresso gets lost — drink tastes mostly of milk

Fix

Milk volume is too high. Reduce the steamed milk to 60 ml (one-third of the total) and increase foam. You may also be using too large a cup — switch to 5–6 oz.

Problem

Shot is sour or weak

Fix

Under-extraction. Grind finer and confirm dose is 18g. Shot should yield 36–40g in 25–30 seconds. A weak, thin shot will taste completely lost in even the small milk volume of a cappuccino.

Frequently Asked Questions

The traditional cappuccino ratio is 1:1:1 — equal thirds espresso, steamed milk, and milk foam. In practice this means a double shot (60 ml) with approximately 60 ml of steamed milk and 60 ml of dense, airy foam, giving a total drink volume of around 150–180 ml.

Some specialty cafés use a slightly wetter ratio (more steamed milk, less foam) for a smoother result. The key is that the foam layer should be thick and domed — at least 1–2 cm — which distinguishes a cappuccino from a latte.

Final Thoughts

The cappuccino is the most technically demanding of the common espresso drinks — but once the milk steaming clicks, it's deeply satisfying to make well. The key is understanding that cappuccino foam is intentionally different from latte microfoam: more air, more volume, enough density to sit as a separate layer rather than integrating completely.

Start with a traditional 1:1:1 ratio in a proper 5–6 oz cup. Focus on introducing more air during steaming than you think you need, and use the spoon test to verify foam density before pouring. Once the base technique is solid, explore dry and wet variations to find your preference.

For more context on how the cappuccino fits among other espresso drinks, see our what is a cappuccino guide and the flat white vs cappuccino vs cortado comparison. For the equipment side, our best espresso machines guide covers every machine our team has tested hands-on.

Get Coffee Tips

Join our newsletter for expert reviews and brewing guides.

We respect your privacy. Unsubscribe at any time.