
Our pick
Subminimal Flick WDT Tool
A widely used multi-needle tool. Check the listing for current pricing and needle options.
Espresso Guides
Last updated
WDT (Weiss Distribution Technique) breaks up clumps in your portafilter before tamping. What it fixes and whether a WDT tool is worth buying.
Affiliate disclosure: this page contains Amazon affiliate links. We may earn a commission if you buy through them, at no extra cost to you, and it never affects our rankings. Read our full affiliate disclosure
Yes, try WDT if your shots channel or taste sour and bitter at once. A bent paperclip or sewing needle works for a trial; a dedicated multi-needle tool like the Subminimal Flick just makes the motion faster and more repeatable.
A short explanation of the technique and the shot problem it solves.
You stir grounds with thin needles before tamping to break clumps caused by static and moisture.
Learn why even density through the basket matters more than tamping.
Even density matters more than tamping pressure, so a level tamp cannot rescue a clumpy bed. The cup often tastes sour and bitter at once; see why espresso tastes sour and the grind size chart, since finer grinds clump more. For a starting point, use the coffee grind size calculator.
Breaking clumps gives water an even path through the whole puck.
Grinders create static, and fine espresso grounds stick together in clumps. Water takes the path of least resistance, so it rushes through loose areas and barely touches dense ones. That is channeling.
Stirring with thin needles separates the clumps and spreads particles evenly through the basket. A uniform bed has similar resistance everywhere, so water flows evenly and extracts more of the coffee at the same rate.
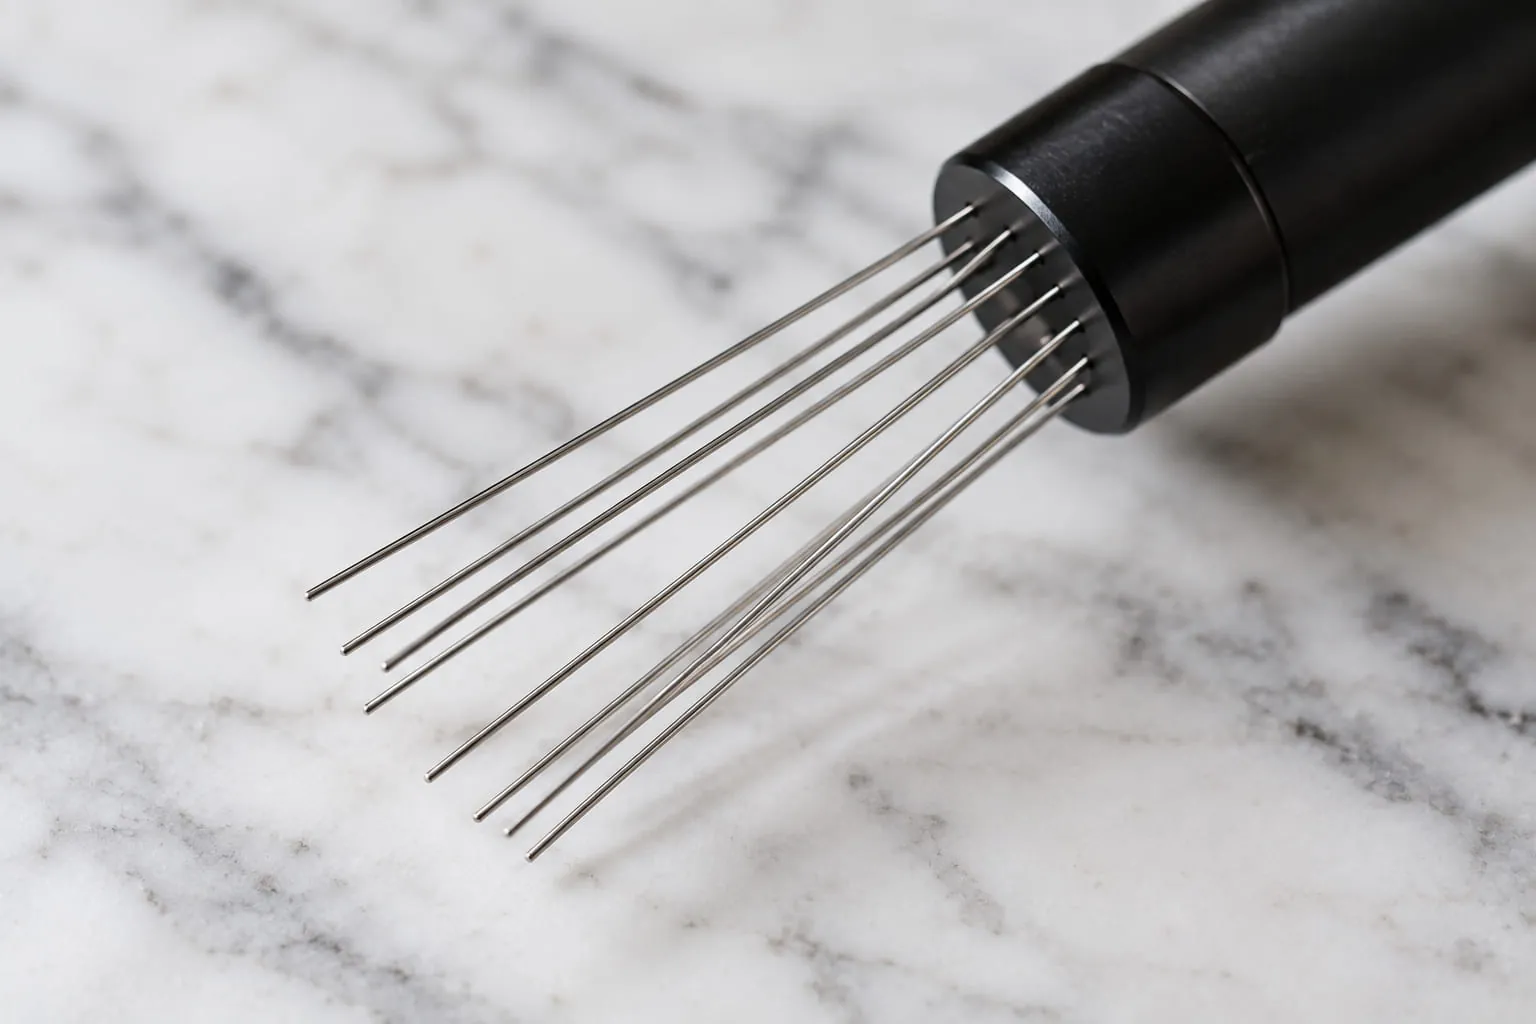
The needle gauge matters. Fine needles (around 0.3-0.4 mm) disturb the bed less than thick ones, which is why dedicated tools often outperform a paperclip.
Decide whether specialist gear is worth buying or a simple tool will do.
No. A tool buys consistency, not a new capability.
| Option | Cost | Result |
|---|---|---|
| Bent paperclip or needle | Free | Works, inconsistent |
| Multi-needle WDT tool | $5-20 | Same motion every time |
| Leveler (no needles) | $15-40 | Levels surface, misses deep clumps |
| Skip it | $0 | Fine if your grinder distributes cleanly |
Bent paperclip or needle
Multi-needle WDT tool
Leveler (no needles)
Skip it
Our pick
A widely used multi-needle tool. Check the listing for current pricing and needle options.
Affiliate links: we may earn a commission at no extra cost to you.
A step by step routine that fits easily into your morning workflow.
Grind directly into the portafilter. To avoid re-clumping.
Insert the needles. To the bottom of the basket.
Stir in small circles. From centre outward for 5–10 seconds.5–10 seconds
Lift straight out. To avoid a divot.
Level, then tamp. WDT does not replace it; see how to tamp.
Compare two common habits to see which one gives the more reliable puck.
Mostly yes. Tapping moves surface coffee and can compact clumps instead of breaking them.
Find out whether your equipment already gives you a head start on this step.
Yes. Grinders with anti-static features and single-dose trays clump less; budget hopper grinders benefit from WDT every time. See the burr grinder guide.
If clumping and retention are the real problem, a better grinder helps more than any tool. Buy the DF64 Gen 2 for a single-dose workflow; skip it if a $5 tool solves your clumps. More in the best coffee grinders.
Low Clumping, Single-Dose Friendly
A single-dose tray and anti-static ionizer mean less clumping going in, though a WDT tool still helps.
Habits that undo the benefit of the technique and how to avoid them.
| Mistake | Fix |
|---|---|
| Stirring after tamping | Stir loose grounds only |
| Single needle | Use a multi-needle tool |
| Using WDT to fix grind setting | See how to dial in espresso |
How WDT fits with modern grinders, screens and pre-infusion.
Lighter roasts and finer grinds tend to need WDT more. If your shots still run fast, check why espresso is too fast or too slow. To check a shot, enter it in our espresso dial-in calculator.
Thirty seconds of stirring that removes most clumps.
Grind your dose into the portafilter, ideally through a dosing funnel to stop grounds spilling.
Insert the needles to the bottom of the basket.
Stir in small, overlapping circles, working from the centre outward and back, for about 10–20 seconds.10–20 seconds
Finish with a few slow circles near the top to leave a level surface.
Tap the portafilter lightly on the counter or a mat to settle the bed, then tamp.
The goal is to break up every clump and spread the coffee evenly from top to bottom, not just to stir the surface. Going all the way to the bottom of the basket matters most, because clumps that stay buried are where channels start. A dosing funnel keeps the grounds in the basket while you stir.
Avoid pressing down while stirring, which compacts some areas before you tamp. Keep the needles moving lightly through the coffee, and if grounds pile up on one side, finish with a few gentle circles to even out the surface before tapping.
Thin needles and enough of them.
Spinning or geared WDT tools that rotate the needles automatically are convenient but not essential. A simple hand tool used carefully does the same job. Our puck screen guide covers the other common puck-prep accessory.
Clean the needles with a dry brush after each use so old grounds do not build up.
More consistent shots rather than a different taste.
WDT does not change the flavour of a well-prepared shot by itself; it makes good shots happen more often. The most noticeable changes are fewer spurts and sprays from a bottomless portafilter, more consistent shot times from one shot to the next, and fewer shots that taste sour and bitter at the same time. Owners of grinders that produce clumps, including many entry-level espresso grinders, usually see the biggest improvement.
If your shots already run evenly and taste good, WDT may only make a small difference, and that is fine. If you see channeling, start with WDT before buying a new basket or grinder. Our espresso channeling guide lists the other causes to check.
WDT also helps when you change beans or grind finer for a new coffee, because finer grinds clump more. If you notice shots getting less consistent after switching to a lighter roast, spend a few extra seconds on distribution before changing anything else. Combined with a level tamp and a weighed dose, it removes most of the day-to-day variation that makes espresso frustrating for beginners.
A short rule of thumb.
Quick decision guide
Your shots channel or taste uneven
Get a WDT tool, then read espresso channeling
Your grinder clumps a lot
A WDT tool helps more than a better tamper
Quick answers before you buy.
No. Filter beds are looser, so clumps matter far less; WDT is an espresso technique.
WDT stands for Weiss Distribution Technique, named after John Weiss.
It means stirring grounds with fine needles to break up clumps and even out the bed before tamping.
It helps reduce it.
Evenly distributed grounds give water fewer weak paths, though tamping level, dose and puck prep also matter.
See espresso channeling for other causes.
A bent paperclip, acupuncture needle or thin sewing needle with a cork handle works for a trial.
Keep needles thin and stir gently so you do not pack the grounds.
A short stir of about 10 to 15 seconds is usually enough.
Reach the bottom of the basket, work in circles, then level before tamping.
Over-stirring can pack the grounds back down.
Yes. WDT fixes distribution, while tamping compresses the bed flat.
Level the surface after stirring, then tamp evenly. See how to tamp espresso.
Keep reading: more guides on the same topic.
 Explained
Espresso6 min read
Are puck screens worth it? They keep your group head cleaner but won't fix channeling. See who should buy one and which size fits.
 How to
Espresso6 min read
How hard to tamp espresso: 15–30 lbs is enough, and a level tamp matters more than force. Calibrate espresso tamping pressure step by step.
 How to
Espresso6 min read
Learn how to tamp espresso: pick the right tamper size, distribute with WDT, press level and fix channeling with a simple routine.

Reader questions
Comments (2)
Ask about your setup or share what worked for you. Comments are checked before they appear.
Does a WDT tool help much with a conical burr grinder like the Encore ESP, or is it mainly for clumpy flat burr grinders?
Good question! Conical burrs like the Encore ESP typically produce fewer clumps than flat burrs, so WDT's benefit is less dramatic. However, some users still find it helpful for breaking up minor clumping and optimizing puck distribution. It's worth trying if you have a WDT tool handy.