

If it is time to replace the machine
OXO Brew 9-Cup Coffee Maker
Solid valve and basket design, with a programmable bloom pause for cleaner extraction. Best for: a dependable everyday drip machine. Skip if you want a hands-off budget machine.
Maintenance Guides
Last updated
Coffee maker leaking water from the bottom, filter basket or carafe? Match the leak to its cause, fix it step by step, or know when to replace.
Affiliate disclosure: this page contains Amazon affiliate links. We may earn a commission if you buy through them, at no extra cost to you, and it never affects our rankings. Learn more
Coffee maker leaking water? Dry the machine, run a plain-water cycle and note where water first appears. Bottom leaks are most often scale, so unplug it and descale first. Basket overflow usually means too much coffee or blocked drain holes, and carafe leaks mean a crack or worn gasket.
Run a water-only cycle over a dry white surface, then match the spot below.
| Where it leaks | Likely cause | Jump to |
|---|---|---|
| Bottom of the machine | Scale, cracked reservoir, worn internal seal | Bottom leaks |
| Filter basket | Too much coffee, wrong filter, clogged drain holes | Basket overflow |
| Lid or carafe | Cracked carafe, worn gasket, lid not seated | Carafe and lid |
Water follows pressure and gravity to the weakest seal.
A drip machine moves water from the reservoir through a heating element into the filter basket. A leak means water is escaping at one of those points: a cracked reservoir, a worn seal or gasket, a loose hose, a clogged filter basket that overflows, or a carafe that is not seated properly.
Limescale is a common hidden cause. Mineral build-up narrows tubes and distorts seals, which raises pressure and pushes water out of weak spots. Overfilling, the wrong filter size or too-fine grounds can also make the basket overflow.
Prevent leaks rather than chase them.
Descale on a schedule suited to your water hardness, and use filtered water if your tap water is hard. Check that the filter is seated flat and the correct size, and that grind size is not too fine. Wipe seals and the carafe lid regularly, and replace gaskets if they are flattened or cracked.
Keep the machine on a level surface and never run it with a cracked carafe. Many models allow you to descale with a citric-acid or ready-made descaler, see our descaling guide. If it still leaks after a clean and a seal check, replacement is usually the sensible route.
The most serious leak, since the base holds the heater and wiring. Check in this order.
It used to work, brewing has slowed, and you have hard water or have not descaled in 3+ months. Deposits narrow the tubes between reservoir and heater.
A dry surface and a faster brew cycle.
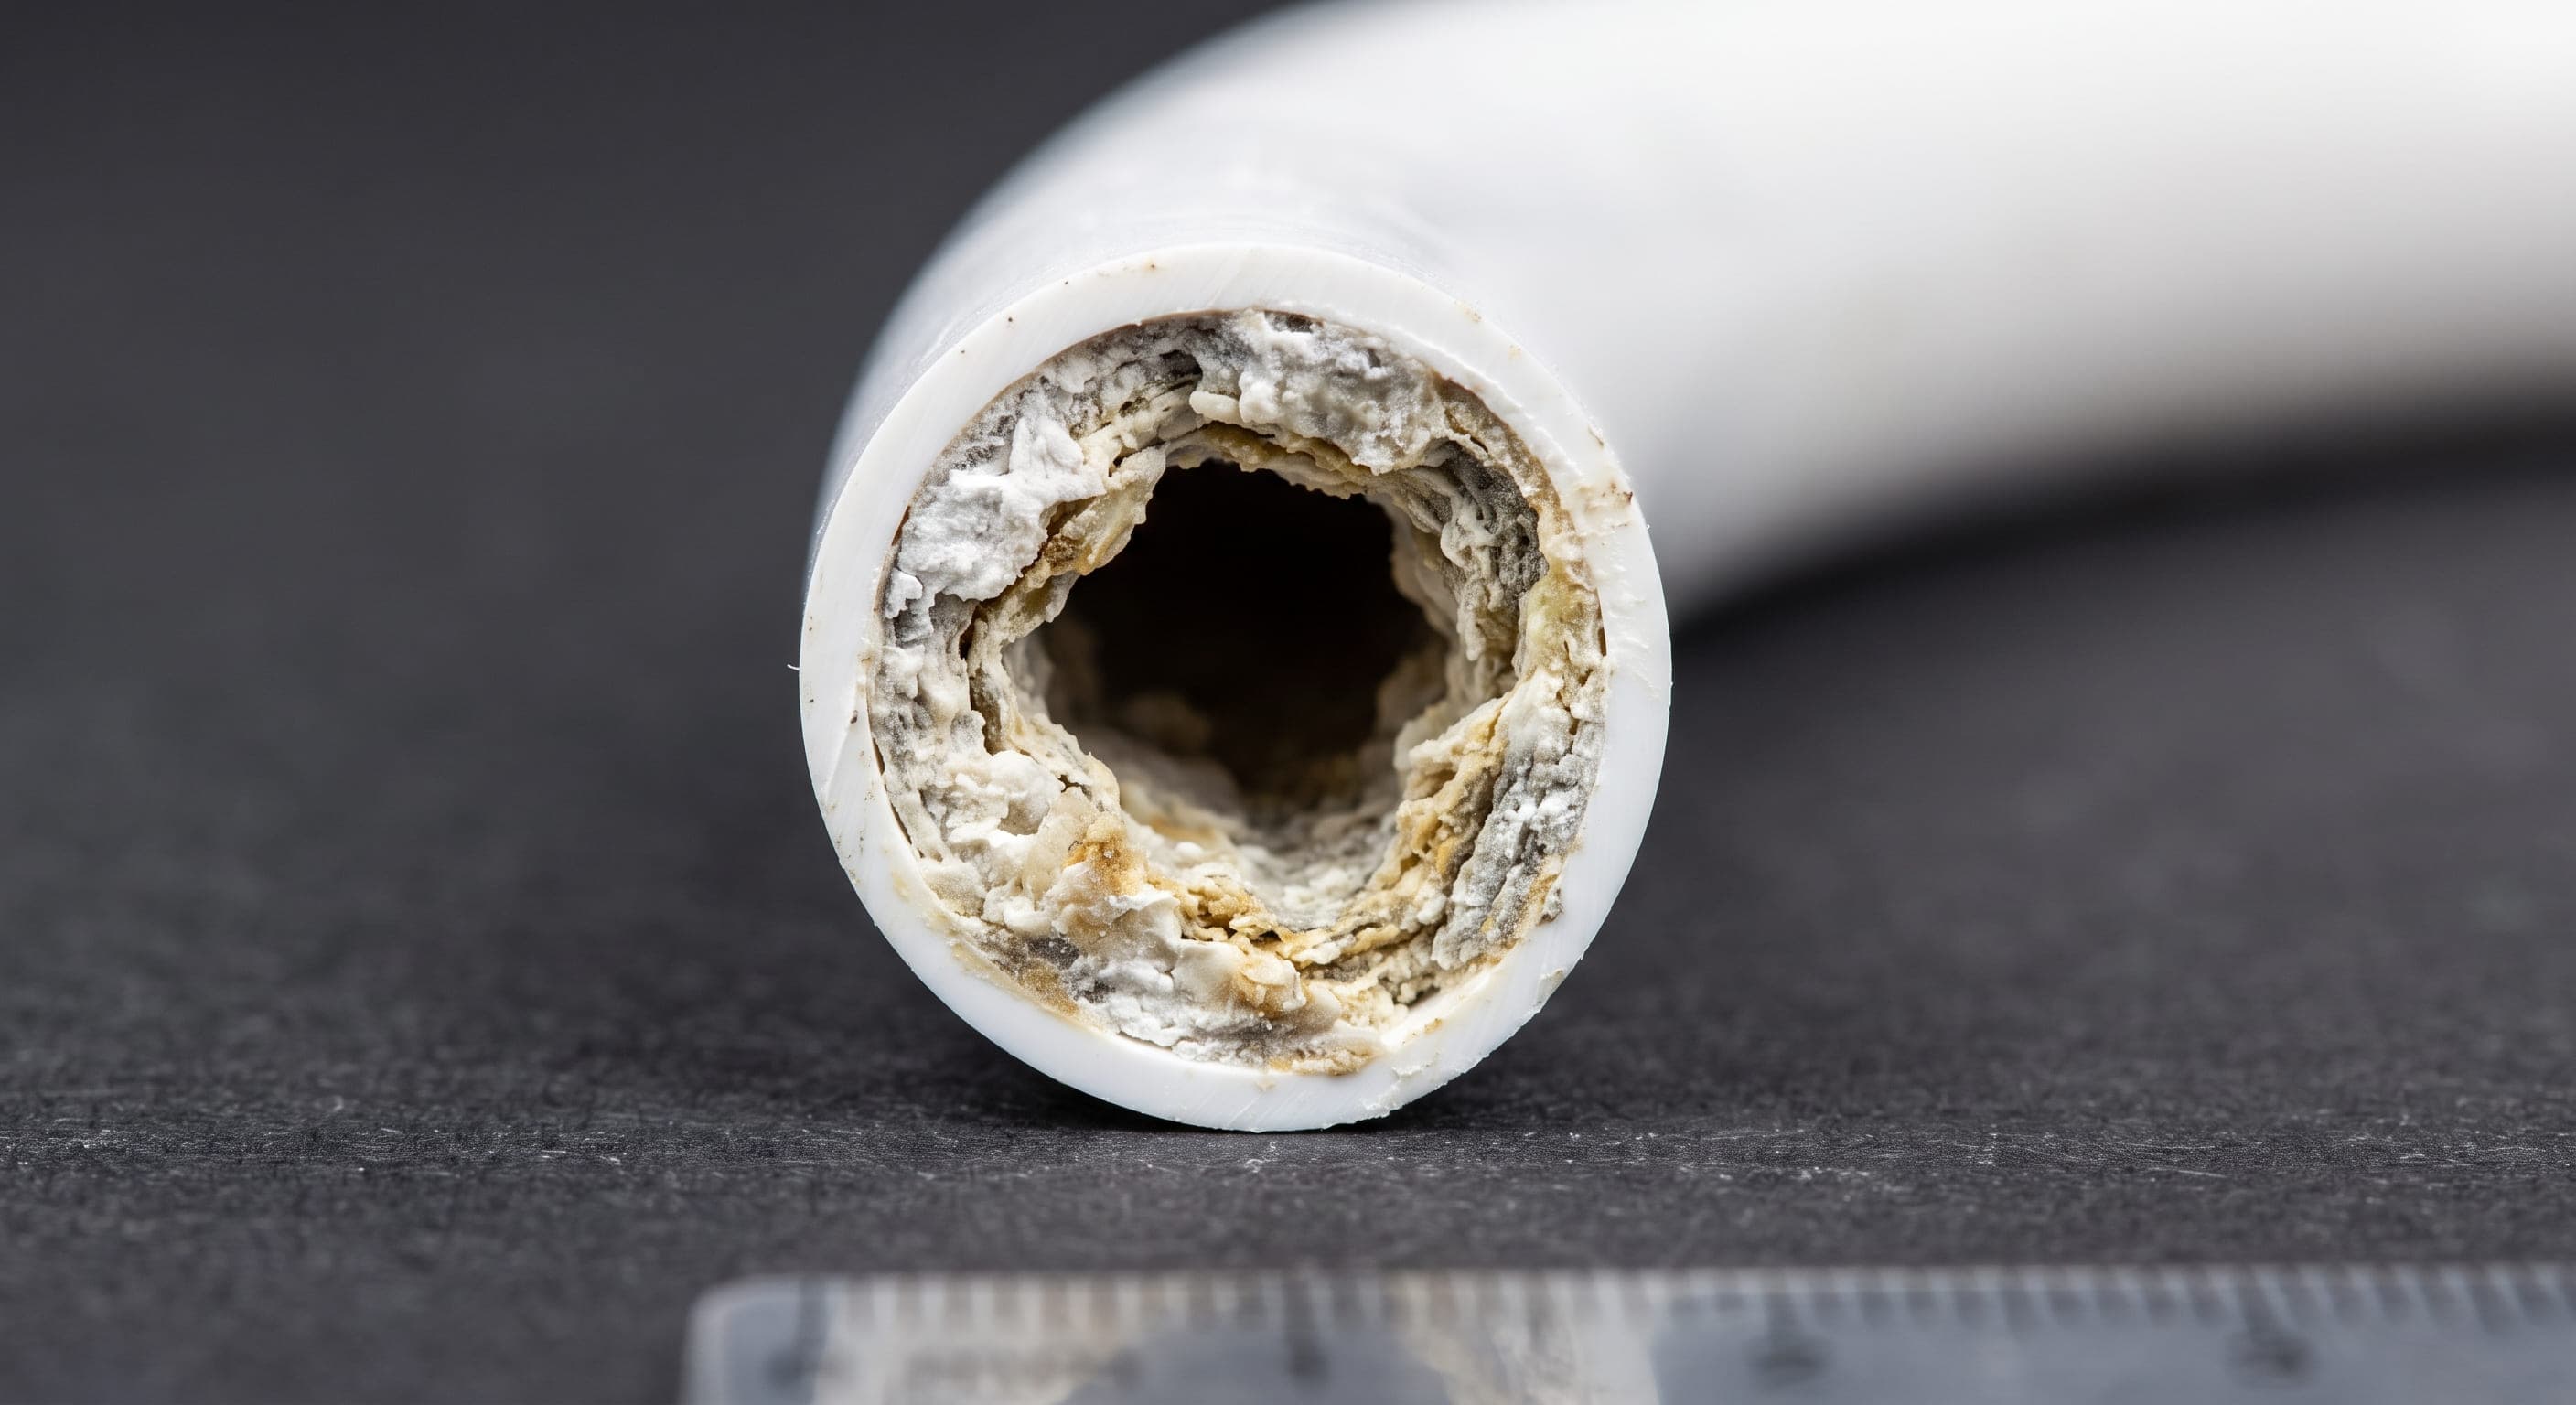
Water appears even after descaling, and a fine crack shows when you fill the reservoir at a sink under bright light. Thin plastic can crack from a knock or repeated heating.
Scale and the reservoir are ruled out. Rubber seals harden and crack after years of heat cycling, and reaching them means opening the machine. That suits only people comfortable with basic electronics, and on most home machines it signals end of life.
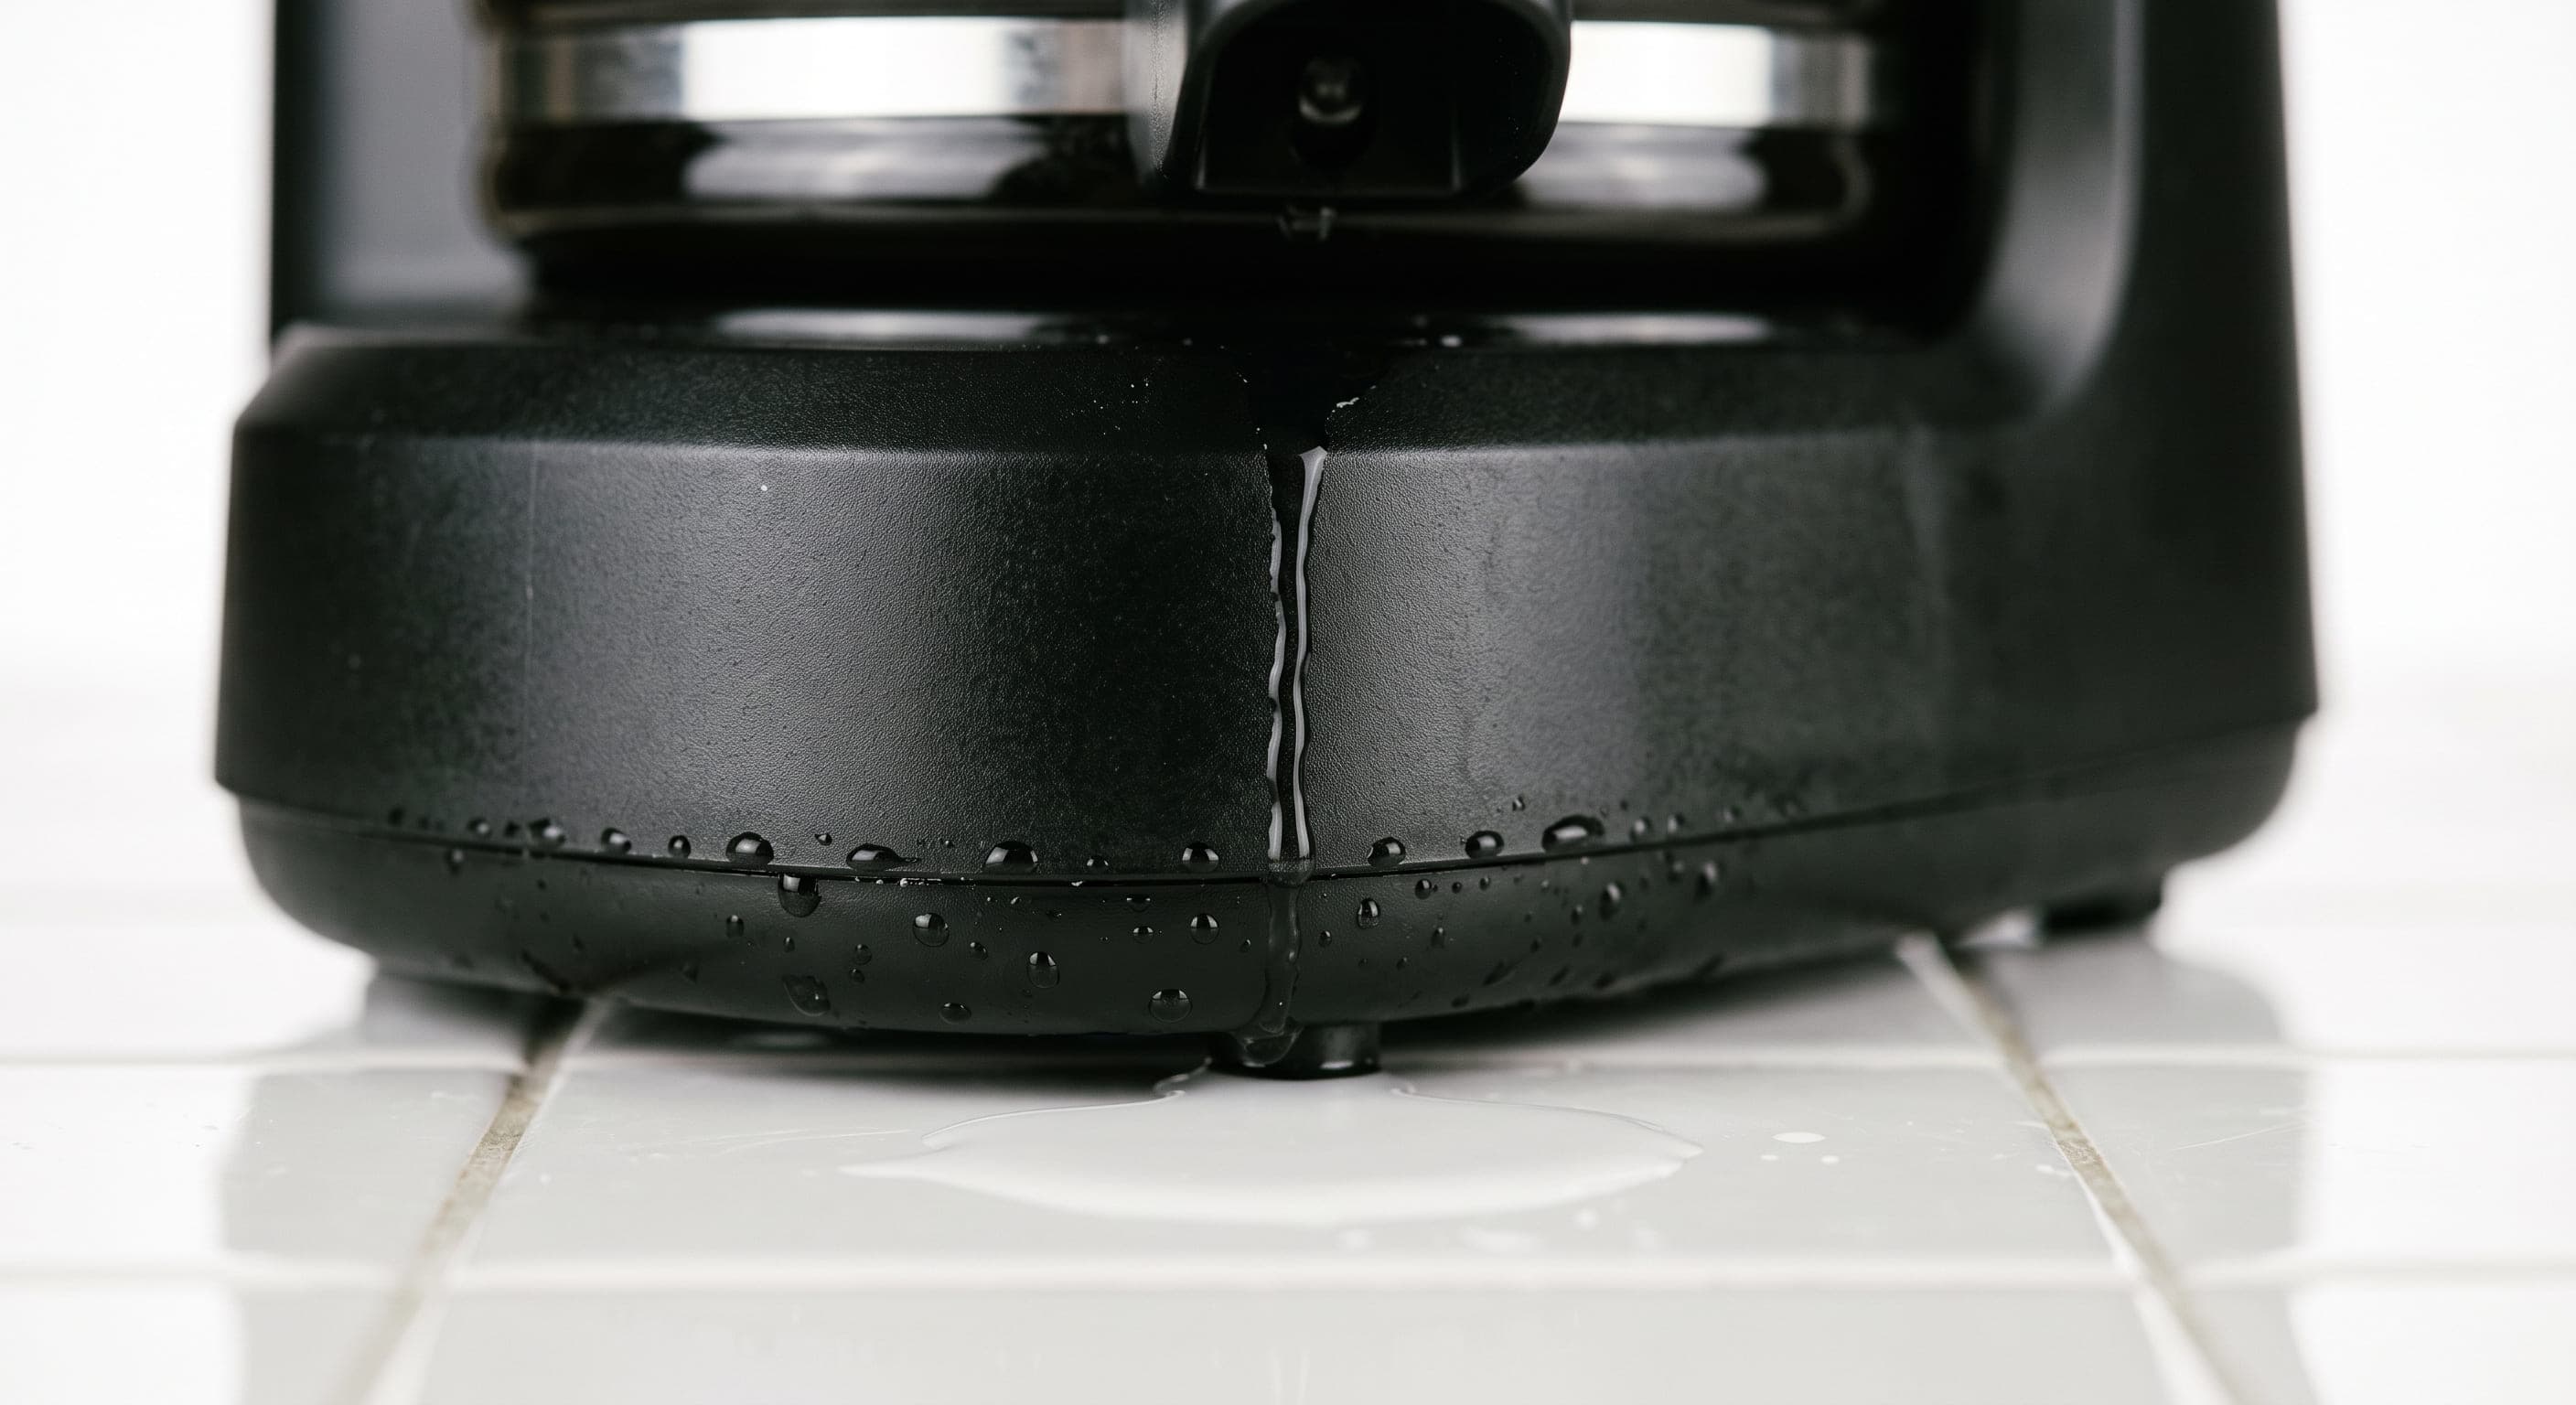
Coffee spilling over onto the warming plate is almost always a user-correctable problem.
The basket is full of slow-draining slurry. Stay within the dose in your manual, and go a little coarser, because a very fine grind packs the bed. The grind size chart shows the right range for drip.
Grounds or water slip past the filter edge. Basket and cone filters are not interchangeable, and one that is slightly small leaves gaps at the walls.
A normal dose still overflows. Fines and dried oils block the small holes, so coffee cannot exit fast enough.
Water drains steadily with no pooling above the filter.
The easiest leaks to diagnose, since you can see where the coffee escapes.
Hold the carafe up to window light and look along the body and base seam for a hairline crack. Glass cracks from thermal shock (a cold carafe on a hot plate, or cold water poured into a hot one), knocks or age. Replace it rather than repair it. Carafes for most major brands come from the manufacturer or third parties, typically $20-$50.
Thermal carafes seal with a rubber or silicone gasket that wears with dishwasher cycles and coffee oils.
It leaks only after cleaning. Partial engagement on push-button or twist-lock lids leaves a gap, so refit the lid until it clicks or locks fully.
A repair stops making sense in these four cases.
If you are replacing, look for quality seals, a well-designed basket and a stainless or heavy-duty carafe. The Fellow Aiden and Breville Grind Control reviews cover precision builds, or compare the best drip coffee makers, the best programmable coffee makers if you want a timer, or the best coffee makers under $500.
If it is time to replace the machine
Solid valve and basket design, with a programmable bloom pause for cleaner extraction. Best for: a dependable everyday drip machine. Skip if you want a hands-off budget machine.
A longer-term replacement
Handmade in the Netherlands, with a copper boiler and all-metal build. Best for: buyers who want a machine to last 10+ years. Skip if you want a budget pick.
Affiliate links: we may earn a commission at no extra cost to you.
Pick the line that matches your situation.
Quick decision guide
It leaks from the bottom and you have not descaled lately
Work through the descaling guide, or try cleaning tablets for routine upkeep.
Your espresso machine, not a drip maker, is leaking
See the espresso machine maintenance guide for gaskets and seals.
Descaling and seal checks changed nothing
Replace the machine, starting with the best drip coffee makers.
Quick answers before you buy.
Not if water reaches the base, cord or heating element: unplug it and stop using it until the cause is fixed.
A basket overflow or carafe drip is a lower risk but still worth fixing.
Common causes are a reservoir that is not fully seated, a clogged needle or built-up scale.
Reseat the reservoir, rinse the pod area and descale the machine.
Yes.
Scale can narrow internal tubes and wear seals, pushing water out through the wrong path.
Regular descaling and cleaning tablets reduce the risk.
No.
Sealants are a poor, unsafe fix on hot parts that touch drinking water.
Replace the gasket or reservoir with a manufacturer part, or replace the machine.
It usually means a seal or crack opens under heat and pressure, or the basket overflows.
Run a water-only cycle over a dry white surface to see where the water first appears.
It can be.
Water near the base and electrics risks a short circuit, so unplug it immediately and let it dry fully.
If water reached the power cord or base electronics, or you see damage, stop using it and replace it rather than repair it.
Keep reading: more guides on the same topic.
 Fix a problem
Espresso3 min read
Sour, thin espresso is usually under-extraction. Work through grind, dose, water temperature, bean age and ratio, one change at a time.
 Fix a problem
Espresso3 min read
Steam wand not frothing milk? Run the plain-water test, then fix clogs, technique, low heat, scale or worn seals in likelihood order.
 Fix a problem
Espresso4 min read
Learn how to fix bitter espresso fast: check grind, temperature, yield, channeling, dirty gear and stale beans, one change at a time.
 Fix a problem
Espresso4 min read
Learn how to increase espresso crema: fix bean freshness, grind, dose, pressure and temperature in order of impact.
