
How to Descale a Coffee Machine (Step-by-Step Guide)
Remove limescale buildup from any coffee maker—drip machines, Nespresso, Keurig, and espresso machines—with expert cleaning routines and the right descaling solutions
If you've been wondering how to descale a coffee machine, you're in the right place—and not a moment too soon. I've tested well over 500 coffee machines across twelve product categories, and limescale is the single most common and preventable cause of premature machine failure. In twelve years of hands-on testing, I've seen expensive espresso machines brew at 78°C instead of their rated 93°C—all because calcium deposits had insulated the heating element. The fix took twenty minutes and cost less than three dollars.
This guide covers exactly how often to descale your coffee machine based on water hardness, the best descaling solution for your coffee machine type, and complete step-by-step instructions for every major machine type—drip makers, Nespresso, Keurig, and espresso machines.
How to Descale a Coffee Machine – Quick Overview
- Mix descaling solution according to descaler instructions and fill the reservoir
- Run a full brew cycle with the solution (no coffee or pods)
- Let solution sit 15–30 min if needed for heavy scale buildup
- Run 2 rinse cycles with fresh water to flush all residue
- Clean removable parts (reservoir, drip tray, portafilter basket)
Full machine-specific instructions for drip makers, Nespresso, Keurig, and espresso machines below.
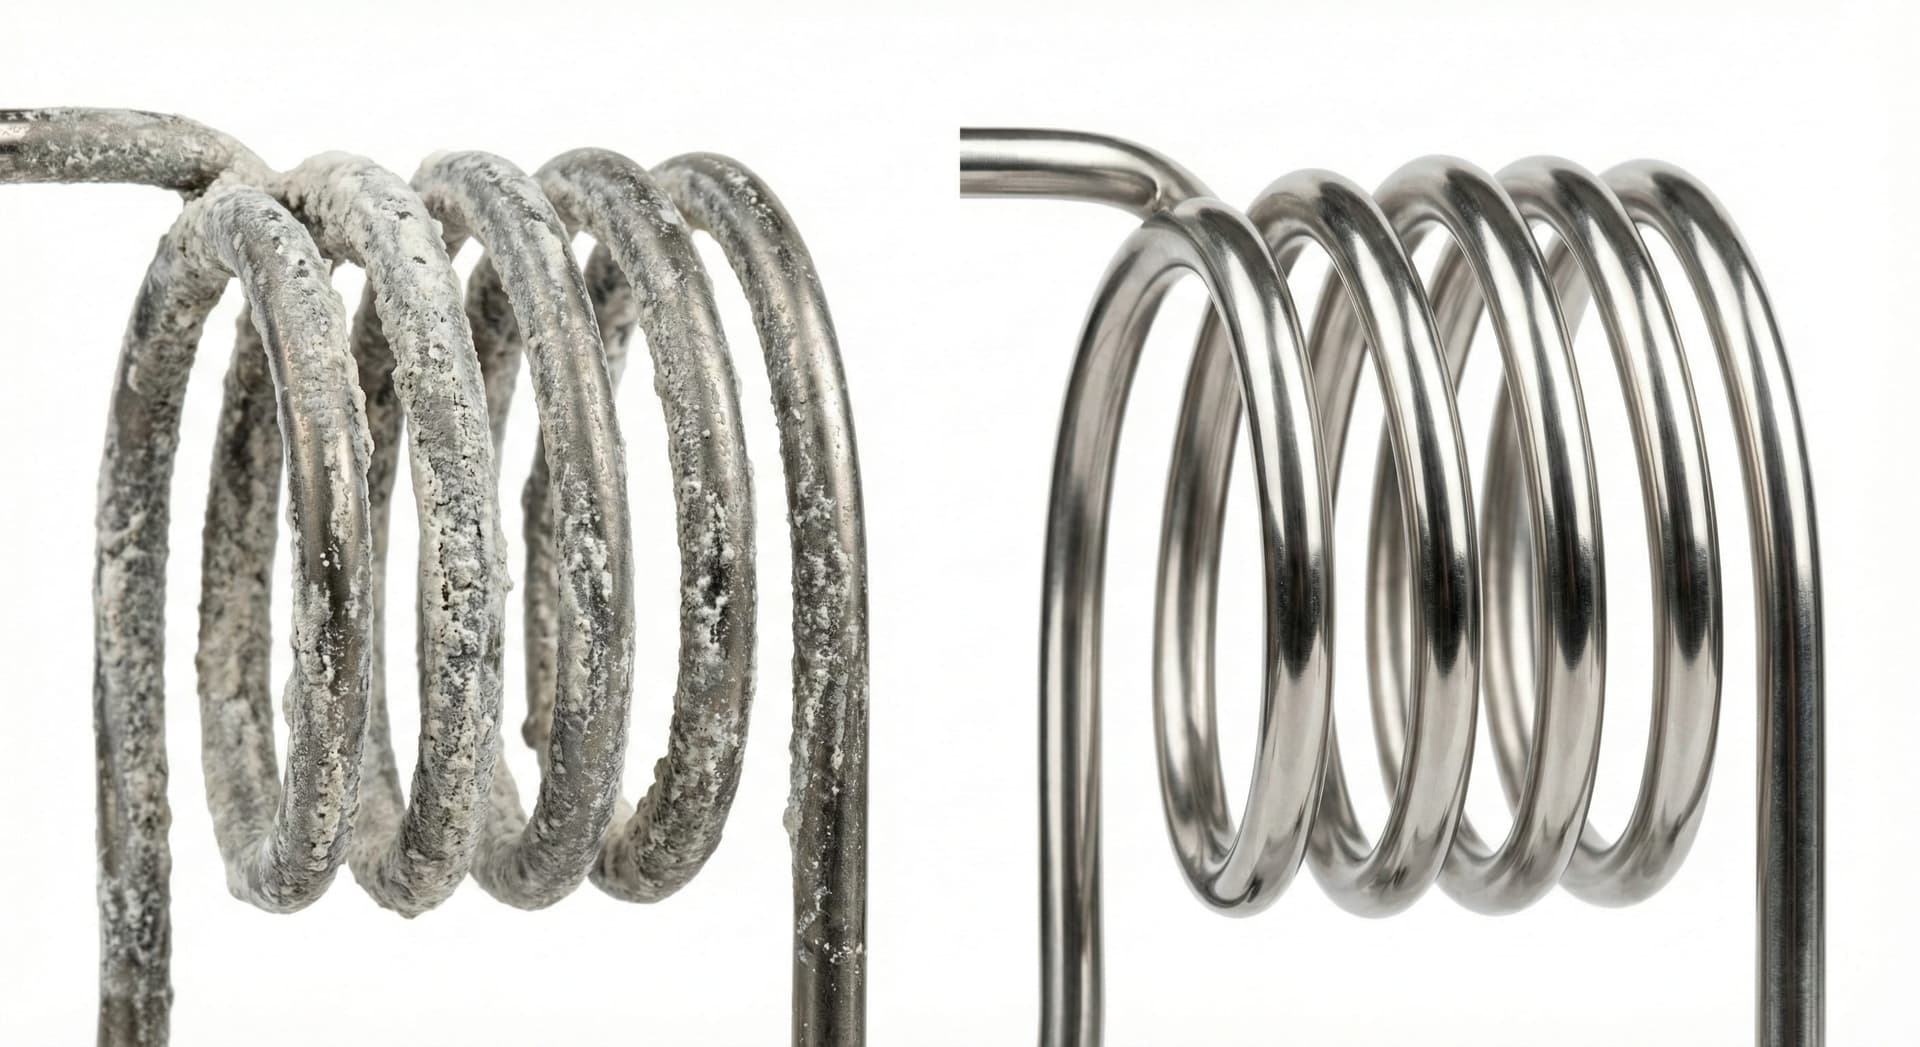
Why Descaling Matters: The Science of Limescale Buildup
Tap water contains dissolved minerals—primarily calcium carbonate and magnesium carbonate. These minerals are harmless in cold water, but when you heat water above about 60°C (140°F), calcium carbonate precipitates out of solution and deposits on heating elements, pipes, boilers, and valves as solid limestone-like scale. This is limescale.
The problem is cumulative and silent. Every brew cycle deposits a microscopic layer. After months of daily use, those layers build up into a genuine insulating barrier around your heating element. Limescale has approximately 30 times the thermal resistance of metals, which means a calcified heating element has to work dramatically harder—drawing more power, running hotter internally, and taking longer—to heat the water passing over it to the correct brewing temperature.
Effect on Temperature
Scaled machines brew 5–15°C cooler than specification. At 78°C instead of 93°C, coffee extracts incompletely—tasting flat, thin, and sour despite using the same beans.
Effect on Flow Rate
Scale narrows water pipes and valve openings, reducing flow rate. Your machine brews slower and may produce less coffee per cycle than normal.
Effect on Machine Life
Severe scale forces the heating element to overheat repeatedly. Element failure is the most common cause of coffee machine death—and it's almost entirely preventable with regular descaling.
How Often Should You Descale? (Based on Water Hardness)
The answer isn't “every month” or “every year”—it depends almost entirely on the mineral hardness of your water and how frequently you brew. In my testing, I've found water hardness is by far the dominant variable. A machine used identically in two different homes can need descaling three times as often in one location due to water differences alone.
| Water Hardness | PPM / GPG | Descale Frequency |
|---|---|---|
| Soft Water | <100 ppm / <6 GPG | Every 6–12 months |
| Moderately Hard | 100–200 ppm / 6–12 GPG | Every 3–4 months |
| Hard Water | 200–400 ppm / 12–24 GPG | Every 2–3 months |
| Very Hard Water | >400 ppm / >24 GPG | Monthly or every 6 weeks |
Don't know your water hardness? You can buy a simple water hardness test strip online for under $10— I'd strongly recommend this if you've never checked. Alternatively, your local water utility is required to publish annual water quality reports with hardness data. Most of the UK, much of Germany, and many US cities like Phoenix, Las Vegas, and Denver have notoriously hard water. The Pacific Northwest, much of Canada, and parts of New England tend to be softer.
Warning Signs Your Coffee Machine Needs Descaling Now
Most machines give you clear signals when limescale buildup is affecting performance. Learn to recognize these—acting early is far easier than dealing with severe scale that's been accumulating for years.
If your drip coffee maker takes 15 minutes to brew a pot that used to take 8, scale is restricting water flow. Same for espresso machines with noticeably slower shot pull times.
If your coffee has been coming out noticeably lukewarm, the heating element is struggling to reach target temperature due to scale insulation. This is one of the most common—and most overlooked—symptoms.
Getting 6 oz from a machine set for 8 oz? Scale buildup in flow paths is restricting water volume. Some machines will auto-stop when pressure builds up excessively.
A machine working harder than usual to push water through calcified pipes produces audible straining—unusual gurgling, bubbling, or pump laboring sounds not present when it was new.
Without changing beans or technique, if your coffee starts tasting different—especially flatter, more bitter, or less aromatic—scale affecting brew temperature is the likely culprit.
Nespresso, many modern Keurigs, and premium espresso machines track brew cycles and water usage to automatically trigger the descaling light. When it appears, do not delay—it means the machine has already reached the point where scale is affecting performance.
White chalky residue visible inside the water reservoir, on the drip tray, around the group head, or on the heating plate is unmistakable limescale. If you can see it from the outside, there's much more inside.
Best Descaling Solutions: What I Actually Use
Over years of testing, I've tried everything from household vinegar to industrial descalers. Here are my tested recommendations by machine type—along with a DIY option that genuinely works.
Urnex Dezcal — Best for Espresso Machines & Drip Makers
Citric acid-based activated scale remover. This is what I use on every espresso machine I test. It's formulated specifically for coffee equipment, dissolves calcium carbonate effectively at low concentrations, and rinses clean without residual taste or odor. Works on any machine that accepts liquid or dissolved descalers.
Check Price on Amazon →Nespresso Descaling Kit — Best for Nespresso Machines
Nespresso's own descaling solution. I recommend this specifically for machines still under warranty—it's formulated to Nespresso's specifications, maintains warranty compliance, and is gentle enough for their capsule system. Each kit includes two sachets (two descaling treatments), which is good value.
Check Price on Amazon →Keurig Descaling Solution — Best for Keurig Machines
Keurig's own branded descaler. Like Nespresso, I recommend using the manufacturer's product on Keurig machines, especially K-Café and K-Supreme models with more complex internal plumbing. The formula is compatible with the plastic components and o-ring seals inside Keurig machines.
Check Price on Amazon →Food-Grade Citric Acid — Best Budget DIY Option
One pound of food-grade citric acid powder costs around $8–$12 and lasts a year or more. Mix 1 tablespoon (roughly 15g) per liter of water for a descaling solution. Citric acid is highly effective at dissolving calcium carbonate, pH-safe for coffee machine internals, leaves zero taste residue after rinsing, and is food-safe. I use this on my personal machines regularly and recommend it for anyone who descales frequently or wants to reduce packaging waste.
Check Price on Amazon →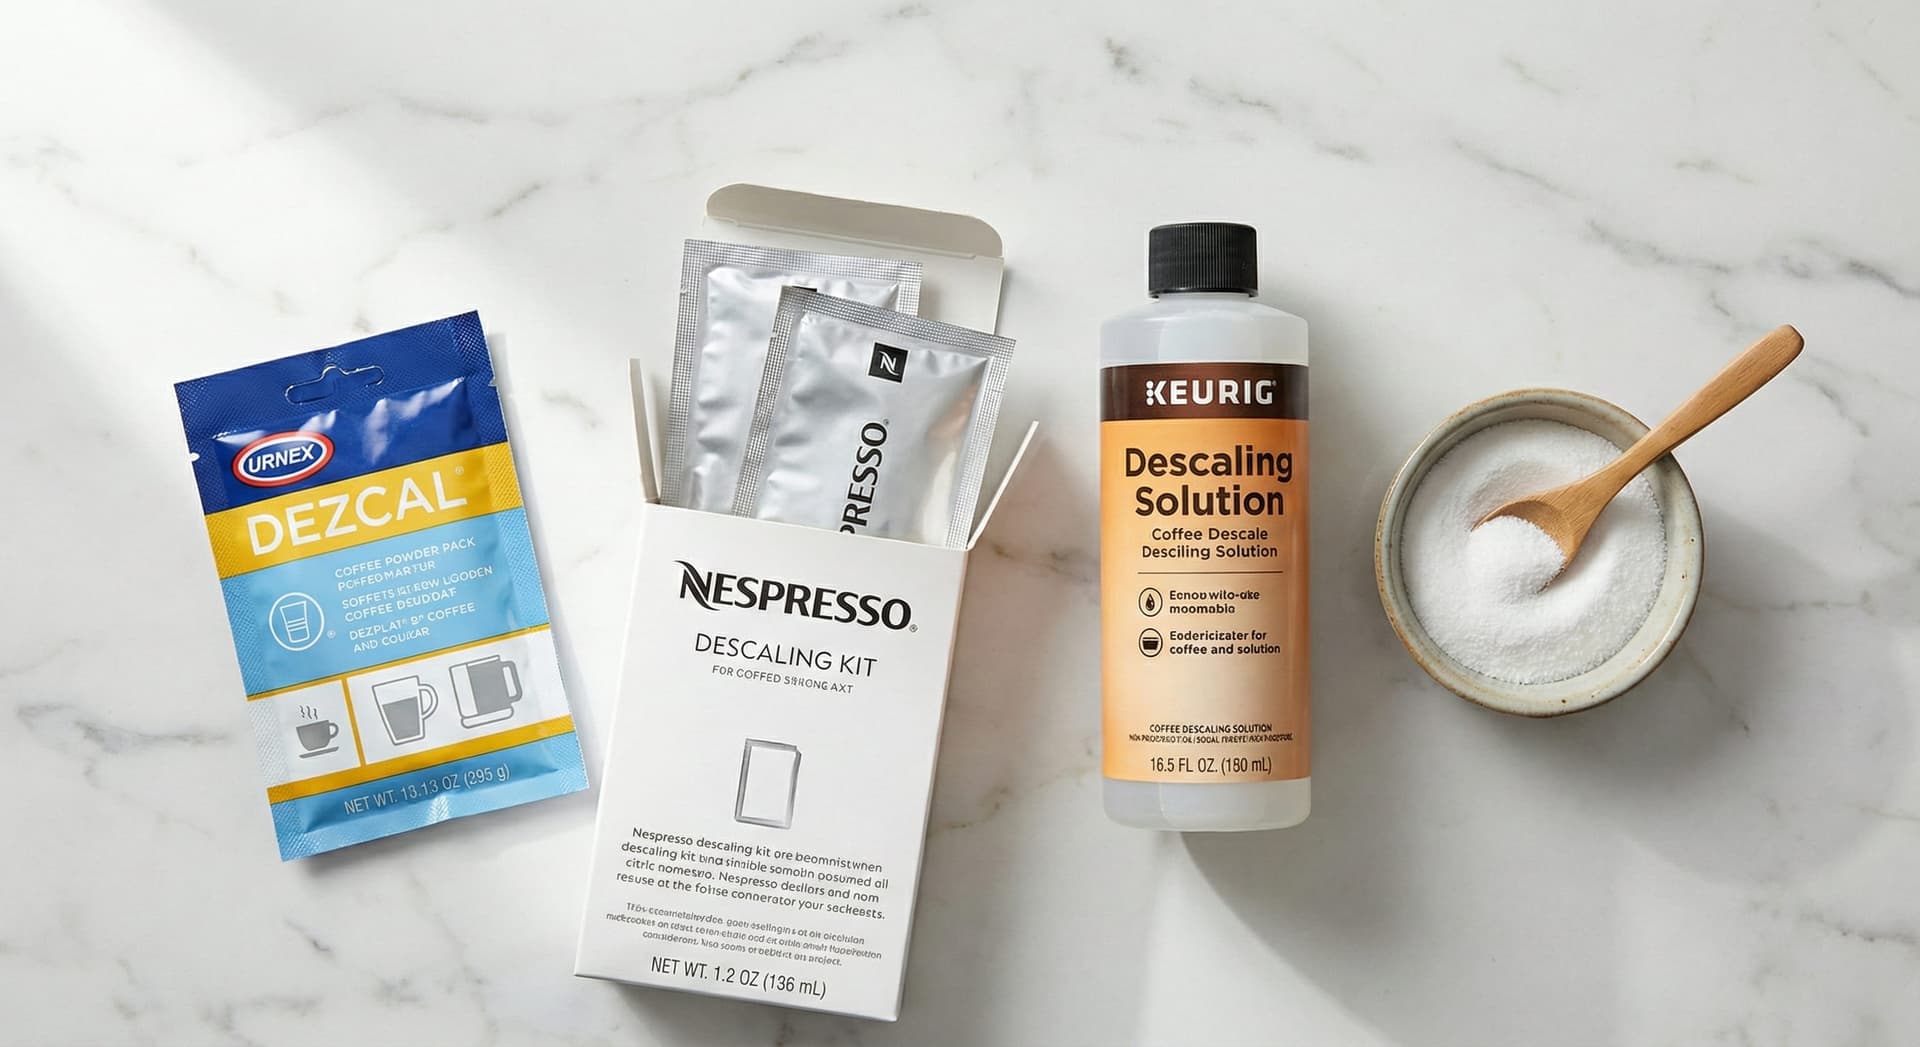
How to Descale a Drip Coffee Maker: Step by Step
Drip machines are the simplest to descale. This process works for virtually all drip coffee makers— Cuisinart, Mr. Coffee, Breville, Hamilton Beach, and others. The whole process takes about 30 minutes.
Empty and Prepare the Machine
Remove the carafe and any paper filter. Discard any old coffee grounds. Rinse the carafe and filter basket with warm water.
Prepare Your Descaling Solution
Mix your descaling solution according to instructions. For Urnex Dezcal: dissolve one packet in 32 oz of warm water. For citric acid: dissolve 1 tablespoon in 32 oz of water. For vinegar (emergency use only): mix equal parts white vinegar and water.
Fill the Reservoir with Solution
Pour the prepared descaling solution directly into the water reservoir. Place the empty carafe back under the brew basket—you'll be collecting the descaling solution as it runs through.
Run a Half Brew Cycle
Start a full brew cycle. After about half the solution has brewed through (watch the carafe fill level), pause or turn off the machine and let it sit for 30 minutes. This soak time allows the descaling acid to dissolve scale inside the boiler and pipes.
Complete the Cycle
After soaking, restart the machine and allow the remaining descaling solution to brew through completely. The drained liquid in the carafe will look cloudy or slightly discolored—this is dissolved scale and is completely normal.
Run Two Fresh-Water Rinse Cycles
Discard the descaling solution from the carafe. Fill the reservoir with fresh, clean water and run a complete brew cycle. Discard this water. Repeat with a second full reservoir of fresh water. Two full rinse cycles remove all descaling solution residue.
Clean Removable Parts
Wash the carafe, filter basket, and any removable parts with warm soapy water. Rinse thoroughly. Wipe down the warming plate and exterior with a damp cloth. Your machine is now descaled and ready to brew.
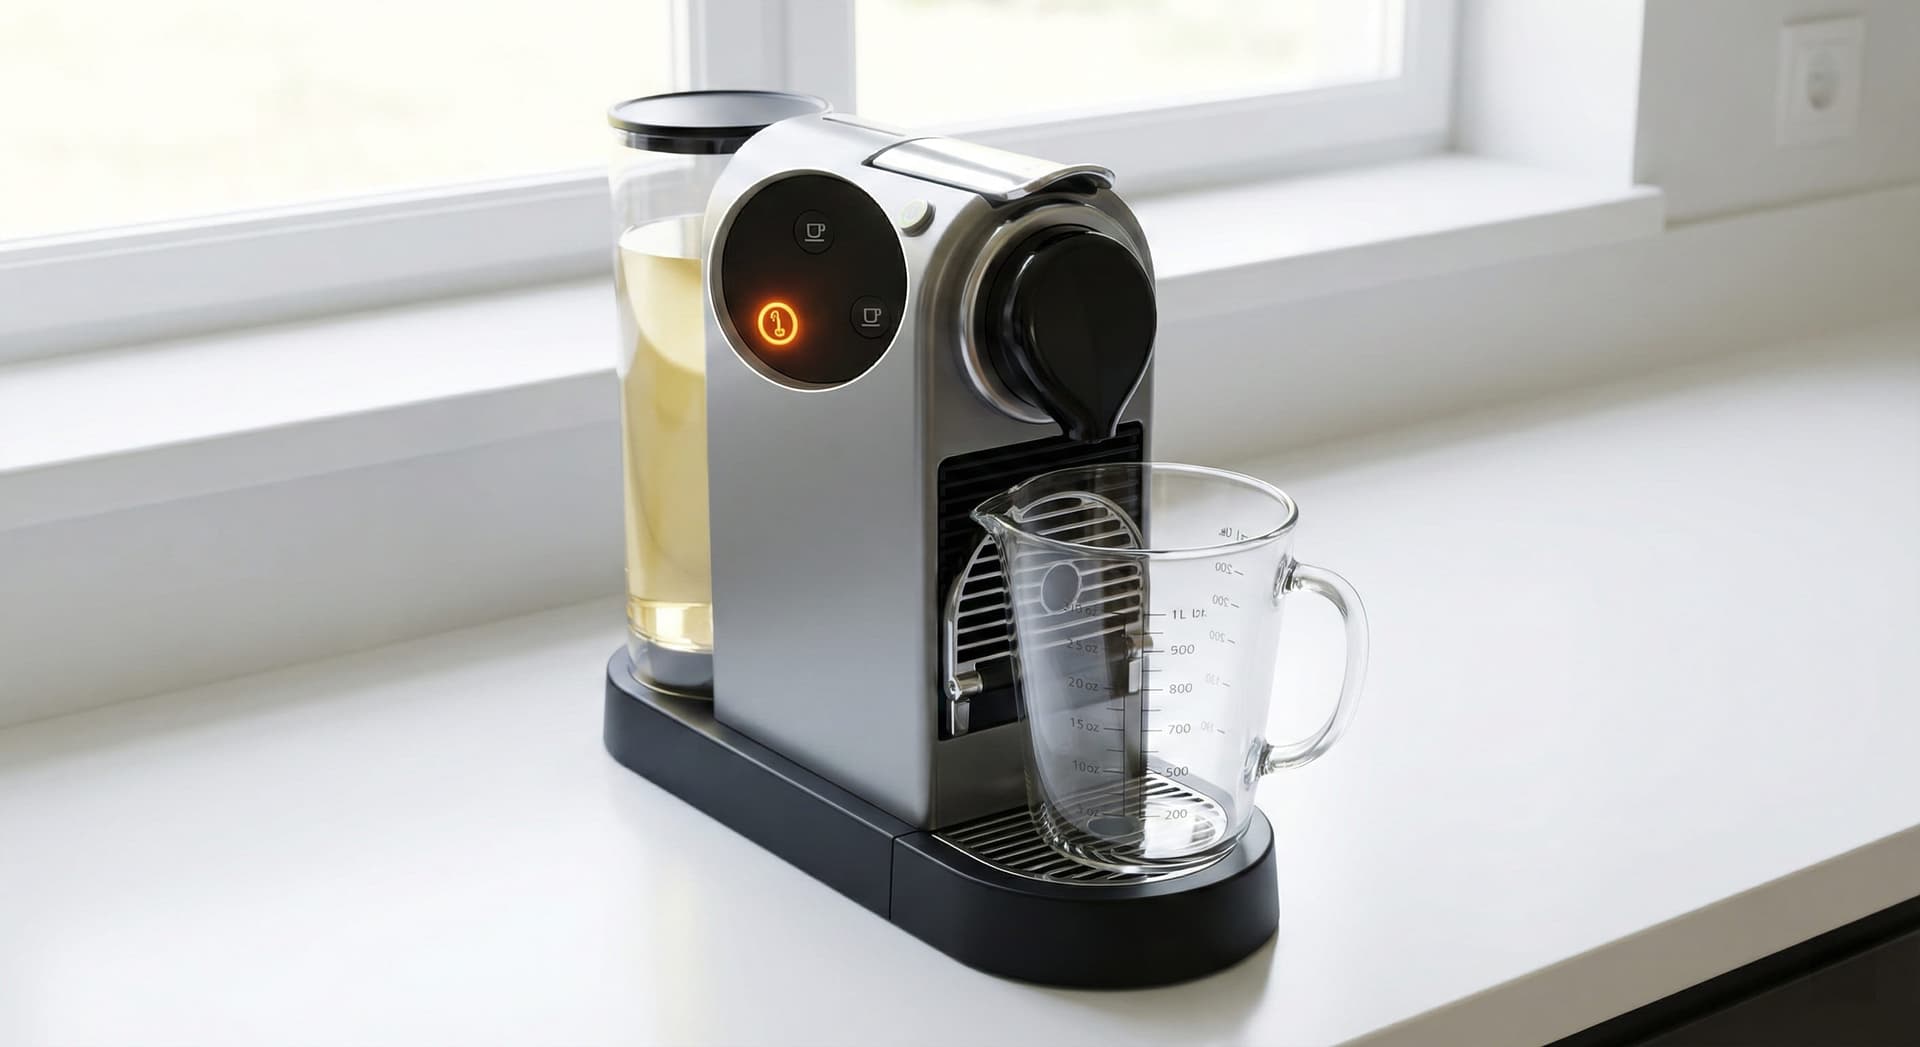
How to Descale a Nespresso Machine: Step by Step
Nespresso machines have a specific descaling mode that must be activated to descale properly. The process differs slightly between Original Line (Essenza, Citiz, Pixie, Inissia) and Vertuo Line (Vertuo, Vertuo Next, Vertuo Pop) machines, but the principle is the same. I'll cover the most common procedure here. For full machine reviews, see our espresso machine reviews.
Prepare Your Machine
Empty the capsule container and drip tray. Remove any used capsules from the machine. Make sure the machine is in standby mode (not in brewing mode). Place a large container (at least 1 liter capacity) under the coffee outlet.
Prepare the Descaling Solution
Fill the water reservoir with 0.5 liters (about 17 oz) of fresh water. Add one Nespresso descaling sachet and mix until fully dissolved. The solution will be clear to slightly yellow.
Enter Descaling Mode
For most Original Line machines: with the machine on, press and hold both the Lungo and Espresso buttons simultaneously for 3 seconds until the buttons blink rapidly. For Vertuo Line: press and hold the button for 7 seconds until it blinks orange, then rotate the lever 3 times and press. Exact steps vary by model—your machine manual has the specific button sequence.
Run the Descaling Cycle
Once in descaling mode, press the Lungo button to start. The machine will pump the descaling solution through in stages—it will pause between stages automatically. Allow the full cycle to complete, which takes about 20 minutes. Do not interrupt the cycle.
Rinse Cycle
After the descaling solution is exhausted, the machine will prompt you to rinse (often indicated by blinking lights). Empty the container, fill the reservoir with fresh water to the maximum line, place the empty container back under the outlet, and press the button to start the rinse cycle. Allow the full rinse to complete.
Exit Descaling Mode
Once the rinse cycle is complete, exit descaling mode—usually by pressing the Lungo button or holding both buttons again until the lights return to steady. Your machine is now descaled. Rinse the water reservoir and drip tray before your first post-descaling brew.
How to Descale a Keurig: Step by Step
Keurig descaling is slightly more involved than other single-serve machines because Keurigs don't have a true descaling mode on most models—instead you run multiple brew cycles with descaling solution followed by multiple rinse cycles. Budget about 45–60 minutes total. This process works for K-Classic, K-Select, K-Elite, K-Café, K-Supreme, and most other Keurig models. Browse our Keurig coffee maker reviews for machine-specific tips.
Prepare the Machine
Power off the Keurig. Remove and empty the water reservoir. Remove any K-Cup pod from the pod holder. If your model has a water filter, remove and set aside the charcoal filter cartridge—never run a descaling solution through the water filter.
Fill with Descaling Solution
Pour the entire bottle of Keurig Descaling Solution (or 10 oz of white vinegar, or 1 tablespoon of citric acid dissolved in 10 oz of water) into the empty reservoir. Then add fresh water to fill the reservoir to the maximum fill line.
Run Brew Cycles Until Empty
Place a large mug (12 oz or larger) under the dispenser. Power on the machine. If you see a "Descale" notification light, press it to start the descaling process. Otherwise, lift and lower the handle (without a K-Cup), select the largest brew size, and press brew. Discard the hot liquid. Repeat this process—brew cycle after brew cycle—until the "Add Water" light turns on or the reservoir is empty.
Soak Period (Optional but Recommended)
Once the reservoir is empty, power off the machine and let it sit for 30 minutes. This allows any remaining descaling solution in the boiler and internal lines to continue dissolving scale. This step is optional but I recommend it for machines that haven't been descaled in over 6 months.
Run Two Rinse Cycles
Rinse and refill the reservoir with fresh water. Run brew cycles (largest size, no pod) until empty—that's rinse #1. Refill and repeat for rinse #2. If you used vinegar, add a third rinse cycle to fully eliminate any residual taste.
Reinstall Filter and Brew a Test Cup
Reinstall the charcoal water filter cartridge (soak in water for 5 minutes first if dried out). Brew one test cup of hot water to verify no descaling solution taste remains. If you detect any residual taste or smell, run one more rinse cycle.
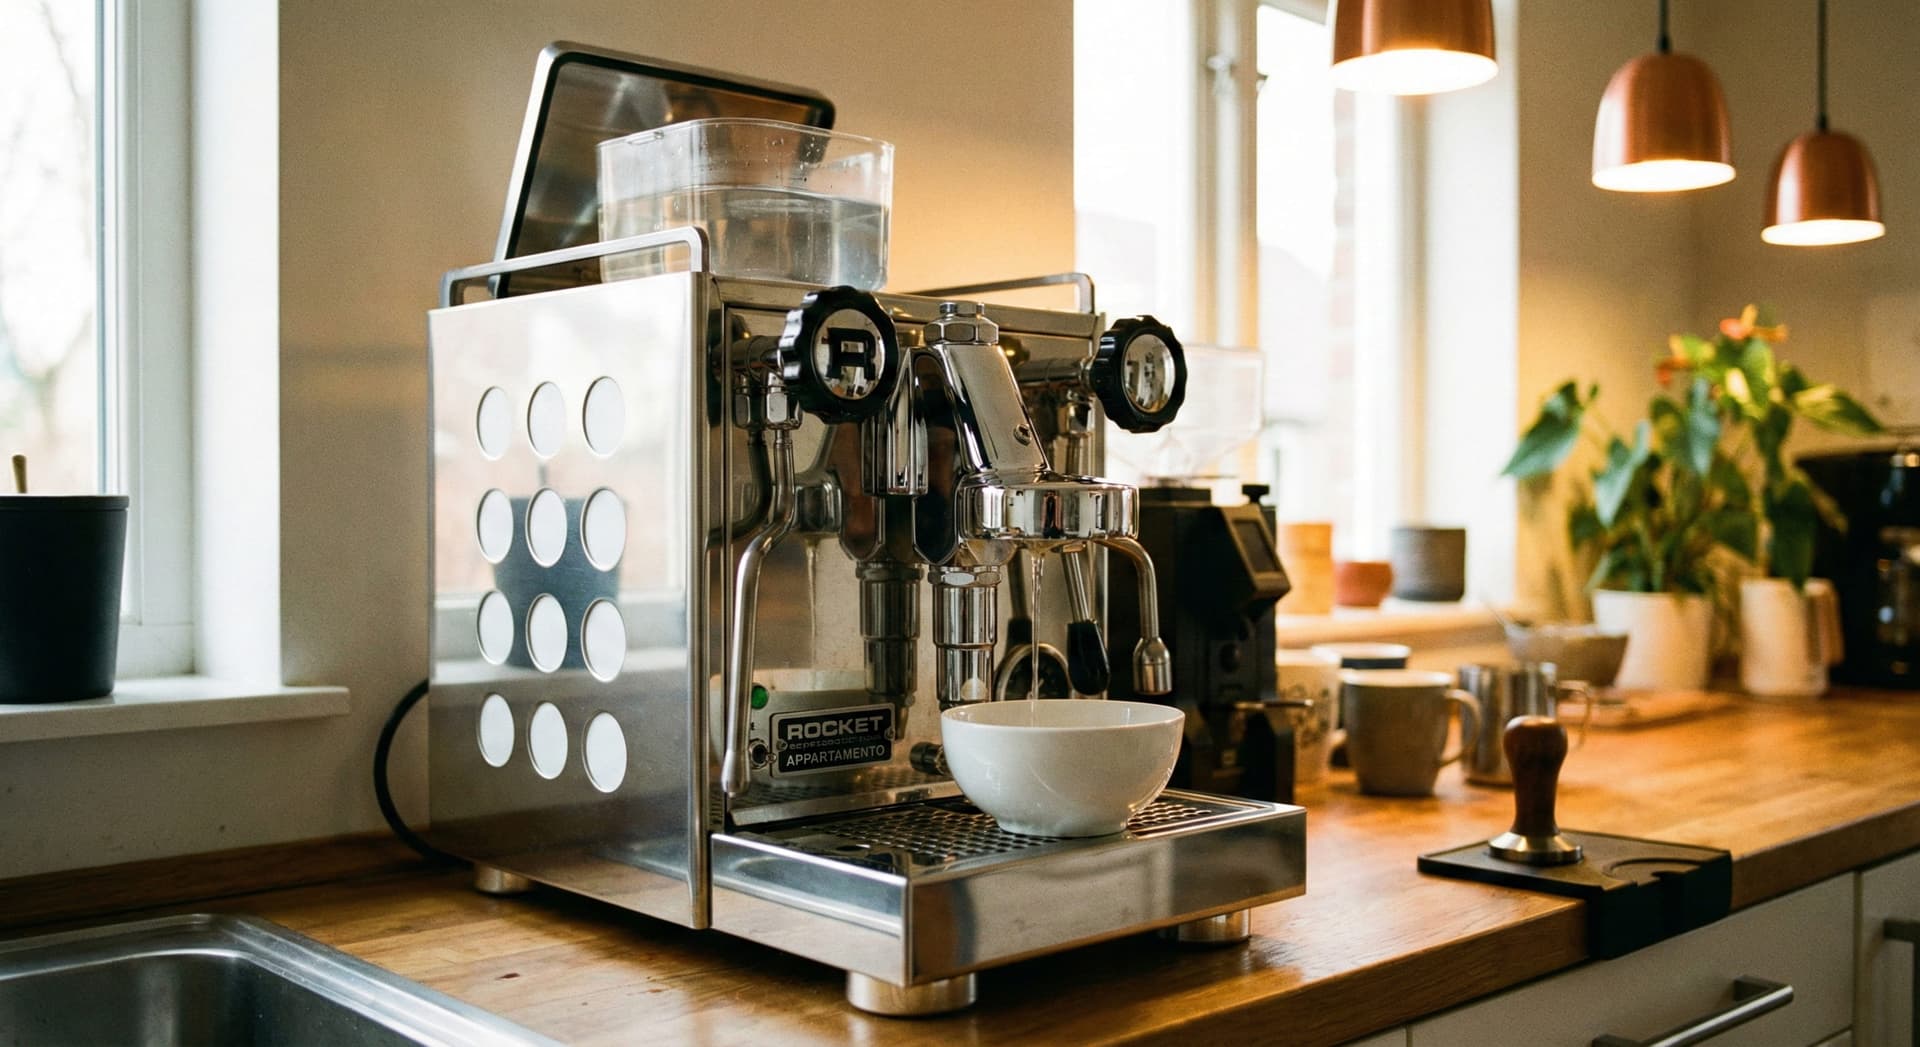
How to Descale an Espresso Machine: Step by Step
Espresso machines are the most critical machines to descale correctly—and the most consequential if you don't. The boiler, group head, steam wand, and internal plumbing in an espresso machine are all susceptible to scale buildup. In my testing, a scaled espresso machine can brew at 5–10°C below spec, which completely destroys extraction quality. This process covers semi-automatic and automatic espresso machines with water reservoirs (Breville, De'Longhi, Gaggia, and similar home machines). See our espresso machine reviews or best espresso machines guide for buying recommendations.
For a complete breakdown of daily, weekly, and monthly cleaning routines including portafilter soaking, group head brushing, and backflushing step-by-step, see our full espresso machine cleaning guide.
Empty and Prepare the Machine
Remove and empty the water reservoir. Remove and empty the drip tray. Remove the portafilter and any coffee grounds. If your machine has a steam wand tip, remove it for separate cleaning. Ensure the machine is fully cooled before adding descaling solution—adding cold solution to a hot boiler can cause thermal shock.
Mix and Add Descaling Solution
Mix the descaling solution according to product instructions (for Urnex Dezcal: one packet in 32 oz warm water; for citric acid: 1 tablespoon per liter). Fill the water reservoir with the descaling solution. Place a large container (at least 1 liter) under the group head and steam wand.
Run the Descaling Cycle (or Manual Flush)
If your machine has an automatic descaling mode (many De'Longhi, Breville, and Jura machines do), activate it per your manual. For machines without a descaling mode: run the machine through its brew cycle without coffee (water only) until half the reservoir is empty. Turn off the machine and let it soak for 15–20 minutes.
Flush Through the Steam Wand
After completing the group head flush, open the steam wand and allow the remaining descaling solution to purge through the steam circuit as well. Scale builds up in steam boilers and wand passages just as readily as in brew circuits. Run until the reservoir is empty.
Run Two Water-Only Rinse Cycles
Rinse and refill the reservoir with fresh water. Run a complete water-only cycle through both the group head and steam wand—that's rinse #1. Refill and repeat for rinse #2. Two full rinses are the minimum; any residual acid in the brew path will ruin shot flavor.
Clean the Steam Wand Tip and Group Head
Soak the steam wand tip in hot water to dissolve any milk residue. Wipe the group head gasket and shower screen with a damp cloth. Reinstall the portafilter and run a blank shot (water only, no coffee) to verify normal flow rate and temperature are restored before brewing coffee.
Test with a Shot Pull
Pull a shot with fresh coffee. Check that extraction time is normal (25–30 seconds for a double shot at your usual settings), temperature is correct, and there are no off-flavors from residual descaler. If you taste anything unusual, run one more rinse cycle.
Daily & Weekly Coffee Machine Cleaning Routines
Descaling handles mineral buildup, but coffee oils and residue require a separate cleaning routine. Old coffee oils turn rancid and bitter, tainting every subsequent brew. In training 200+ baristas, I saw more coffee quality problems caused by poor daily hygiene than by poor technique. Here's the routine I teach every trainee on day one. Find more maintenance advice in our Maintenance & Troubleshooting guides.
Daily Cleaning (Every Day)
- ✓Empty and rinse the drip tray—stale water breeds mold and bacteria
- ✓Empty and rinse the water reservoir (don't let water sit for days)
- ✓Wipe down the steam wand immediately after use with a damp cloth while still warm
- ✓Purge the steam wand after each use—open steam briefly to blow out milk residue from inside the tube
- ✓Rinse the portafilter and basket under hot water after each shot; knock out grounds immediately
- ✓Run a blank shot of water (no coffee) through the group head after your last espresso of the day
- ✓Wipe the group head shower screen with a damp cloth
Weekly Cleaning (Once a Week)
- ✓Backflush the group head with water only (if machine has 3-way solenoid valve)
- ✓Backflush with espresso machine group cleaner (Cafiza, Puly Caff) monthly or as residue builds
- ✓Remove and soak the portafilter basket in hot water for 20 minutes to dissolve coffee oils
- ✓Soak the steam wand tip in a small cup of hot water for 10 minutes
- ✓Wash the water reservoir with mild dish soap; rinse thoroughly
- ✓Clean the drip tray and grate with soapy water; dry completely before reinstalling
- ✓Wipe down the entire machine exterior with a damp cloth
- ✓For drip machines: remove and clean the shower head if accessible (small holes can clog)
Monthly Maintenance Checklist
- □Descale if water hardness or usage frequency warrants it (check frequency table above)
- □Deep-clean portafilter basket in Cafiza solution (1 teaspoon in 1 liter of hot water, soak 30 minutes)
- □Check and replace water filter cartridge in Keurig or Nespresso if used
- □Inspect and clean group head gasket—if it's cracking or no longer sealing properly, replace it
- □Run a machine-cleaner backflush cycle if you have an espresso machine with solenoid valve
- □Check that all removable drip tray and reservoir parts are fully dry before reassembly to prevent mold
- □For drip makers: run a cycle with dish soap and water, followed by two plain water rinses, to clean the carafe and internal paths
Frequently Asked Questions
White vinegar works in a pinch but isn't ideal for regular use. It can degrade rubber seals over time and the smell and taste are stubborn—hard to fully rinse out.
If it's all you have, dilute 1:1 with water and run at least three rinse cycles. For routine maintenance, use a purpose-made citric acid descaler—it's more effective and safer for your machine.
Descaling Frequency Cheat Sheet
| Machine Type | Soft Water | Hard Water | Key Signal |
|---|---|---|---|
| Drip Coffee Maker | Every 6 months | Every 2–3 months | Slower brew time |
| Nespresso | Every 3–4 months | Every 1–2 months | Orange indicator light |
| Keurig | Every 3–6 months | Every 2–3 months | Descale light or slow brew |
| Espresso Machine | Every 3–4 months | Every 4–6 weeks | Cooler shots or slow flow |
Intervals assume average daily use. Using filtered water can extend all intervals by 60–70%. See the water hardness table above for precise guidance.
Get Coffee Tips
Join our newsletter for expert reviews and brewing guides.